Is anyone else making a basement into a playroom? We have a finished portion of our basement that we have decided to use as a combination Craft Room and Play Room. I have slowly been transforming the room from a plain white box that was used as a storage area into a fun bright and inspiring environment. One of the first projects tackled were these magnetic boards. One is a magnetic chalkboard (right) and one is just a magnetic board (left).

These were an important component to the room because I knew that I wanted some type of vertical work surface where children could play. Vertical work surfaces are wonderful tools in helping children develop many of the skills needed for school and learning, such as fine motor skills, visual motor skills and shoulder strength and stability. The occupational therapist in my past used these surfaces all of the time as tools to secretly work on skills and children didn’t even realize it! (That is one of the tricks of being a pediatric therapist – tricking your patients into doing work when they think they are just having fun :-))
 Eliana having fun painting but also working on visual motor, fine motor and
shoulder strengthening while crafting on her vertical work surfaces!
Unlike the other DIY Chalkboards I have made, these are also magnetic, which is great because so many children’s toys have magnets and can be used on these: magnetic letters, numbers, gears, animals, the list goes on and on! They were very easy to make and cost less than $20 dollars/each. Best of all, as with all DIY projects, you can make them to fit your space!
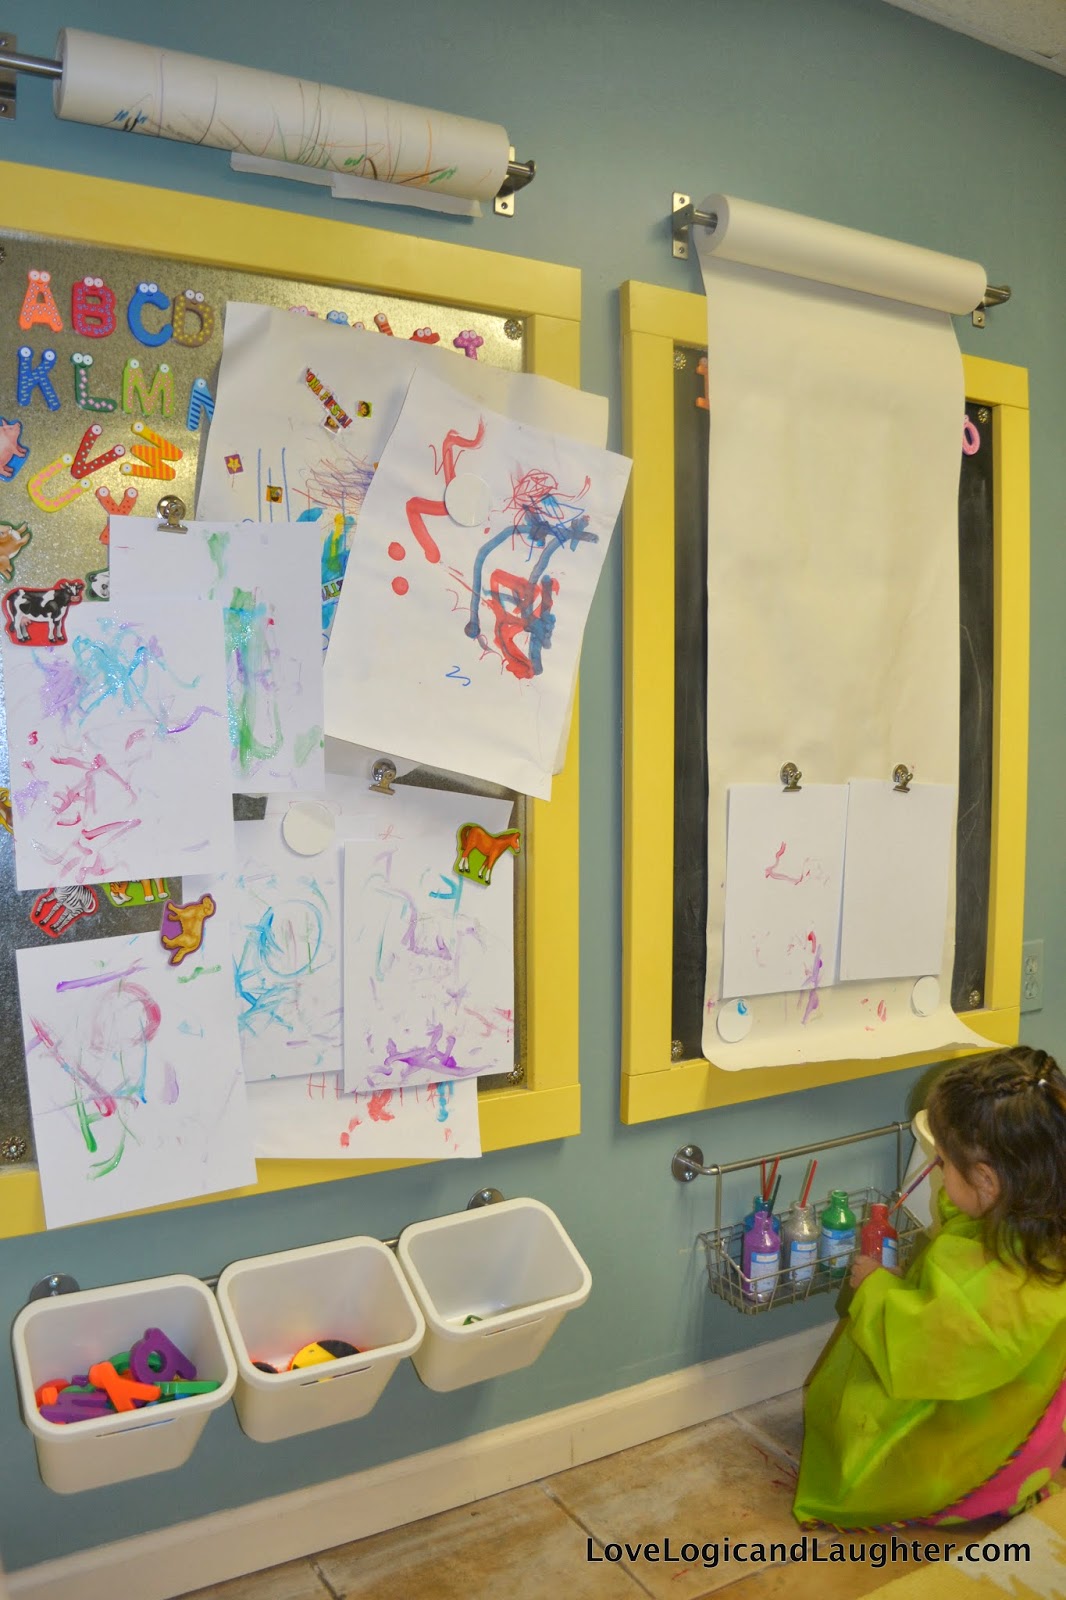 Our boards are loaded up with drying artwork and magnets!
How We Made Our Vertical Work Surfaces: 1 Magnetic Board & 1 Magnetic Chalkboard
Materials:
- Sheet Metal
- Chalkboard Spray Paint
- Color of Your Choice Spray Paint (we used yellow)
- Construction Adhesive
- Saw
- Plywood
- 1×3 MDF trim boards
Directions:
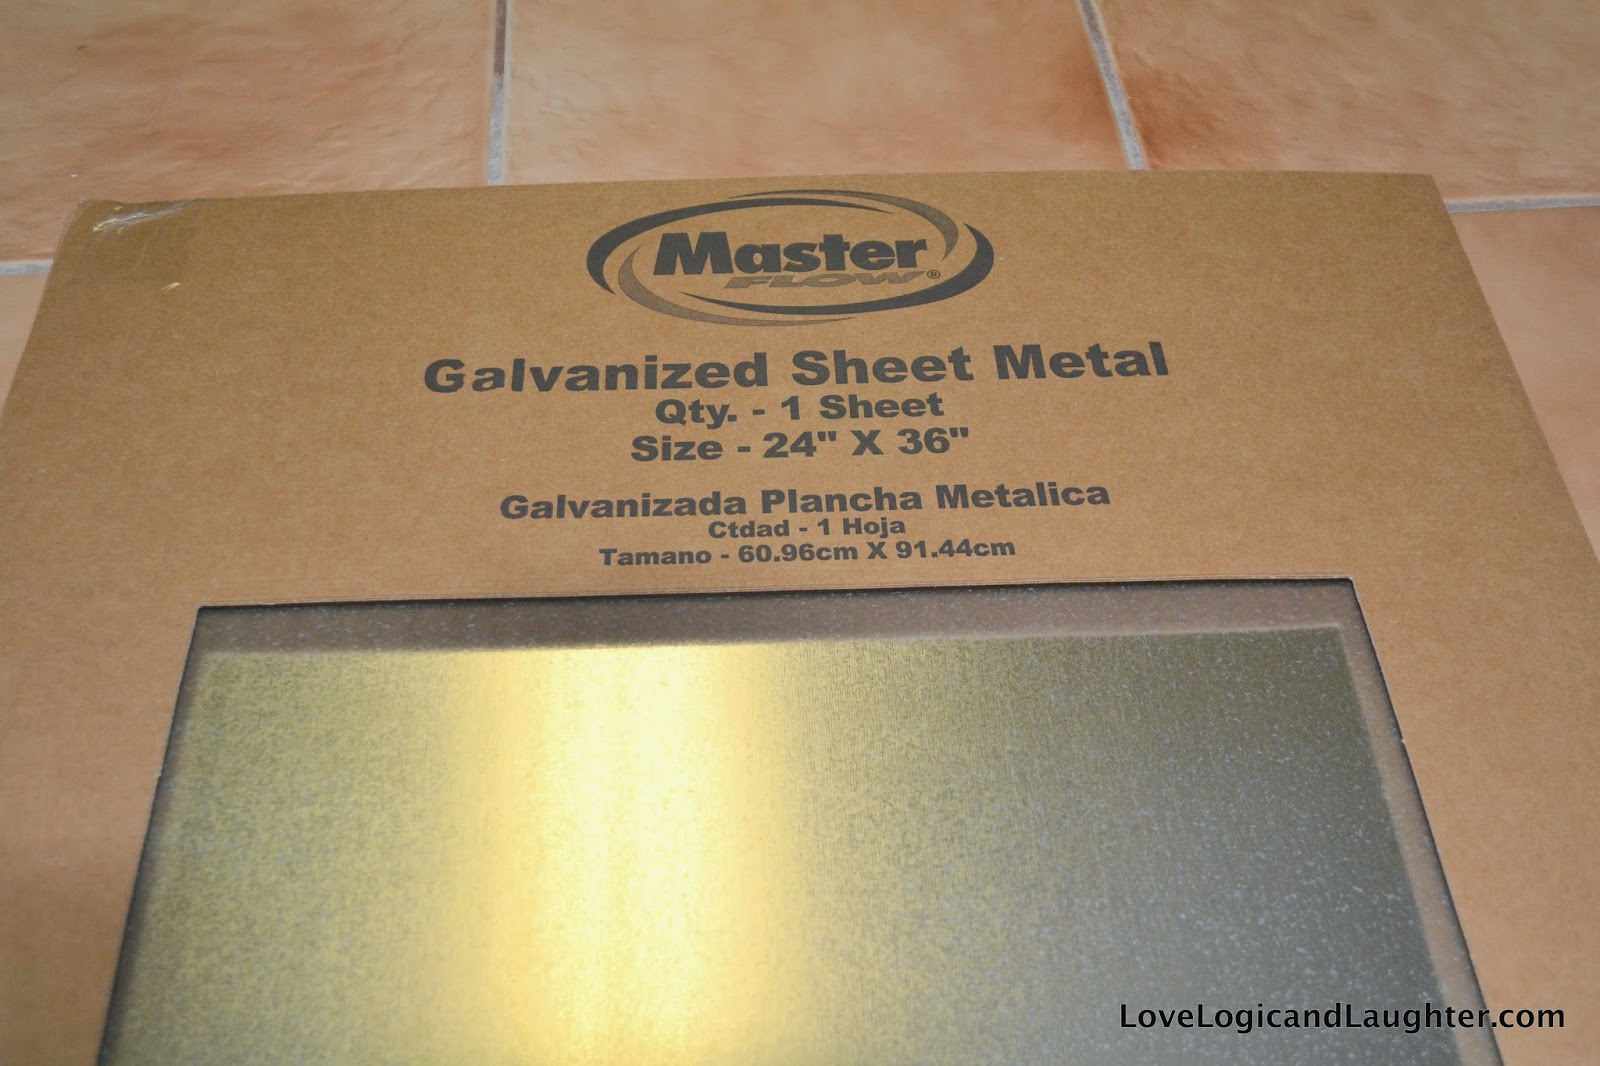
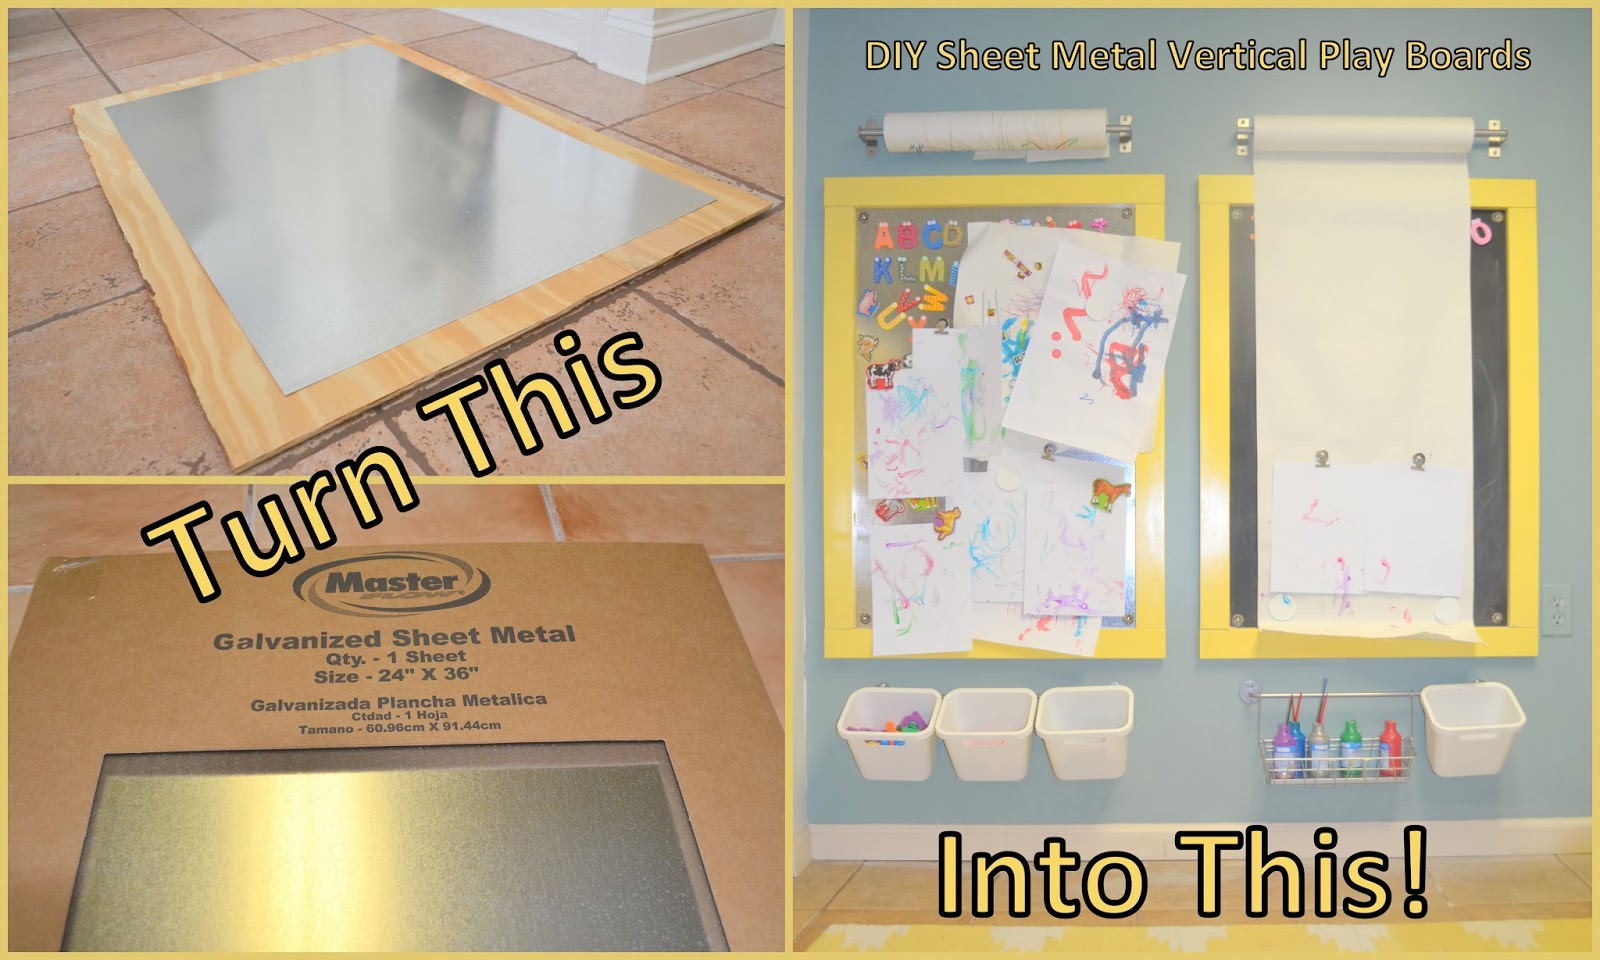
I found a piece of sheet metal that came in 24″x 36″ sections. I bought two of these and glued them onto a piece of plywood that I had cut to 29″ x 41″. You want the piece of plywood to be bigger than your sheet metal so that you can glue your 1×3 MDF boards onto to it for your trim.
This is how the sheet metal came packaged:

I cut the trim boards and dry fitted them while my weights (i.e. books) were holding the sheet metal to the plywood as the construction adhesive dried. I bought pre-primed white MDF trim boards (below left). I then spray painted the MDF boards yellow and glued them to the plywood (below right).
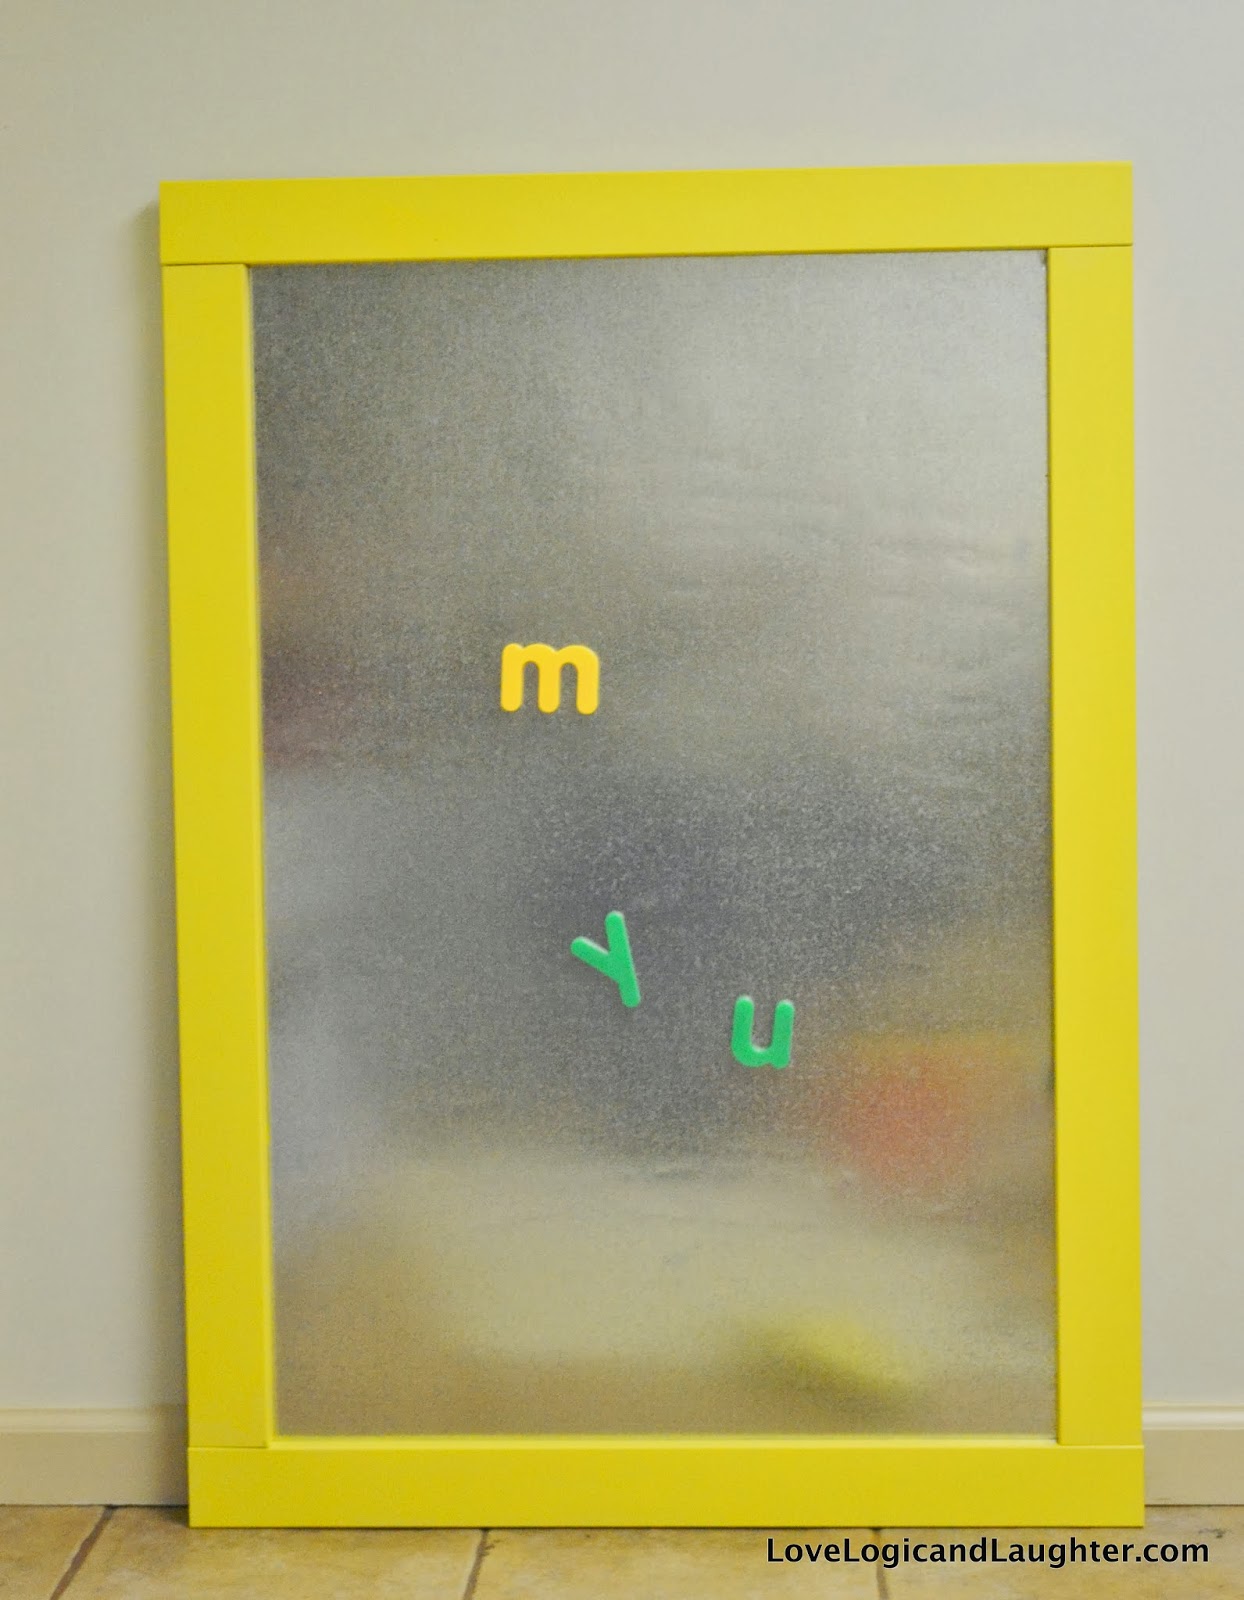 One board finished with a few magnetic letters stuck to it.
For the second board I followed the same steps for the first board with the exception of spray painting the sheet metal with chalkboard paint prior to glueing it onto the plywood. Below is the second board in progress:
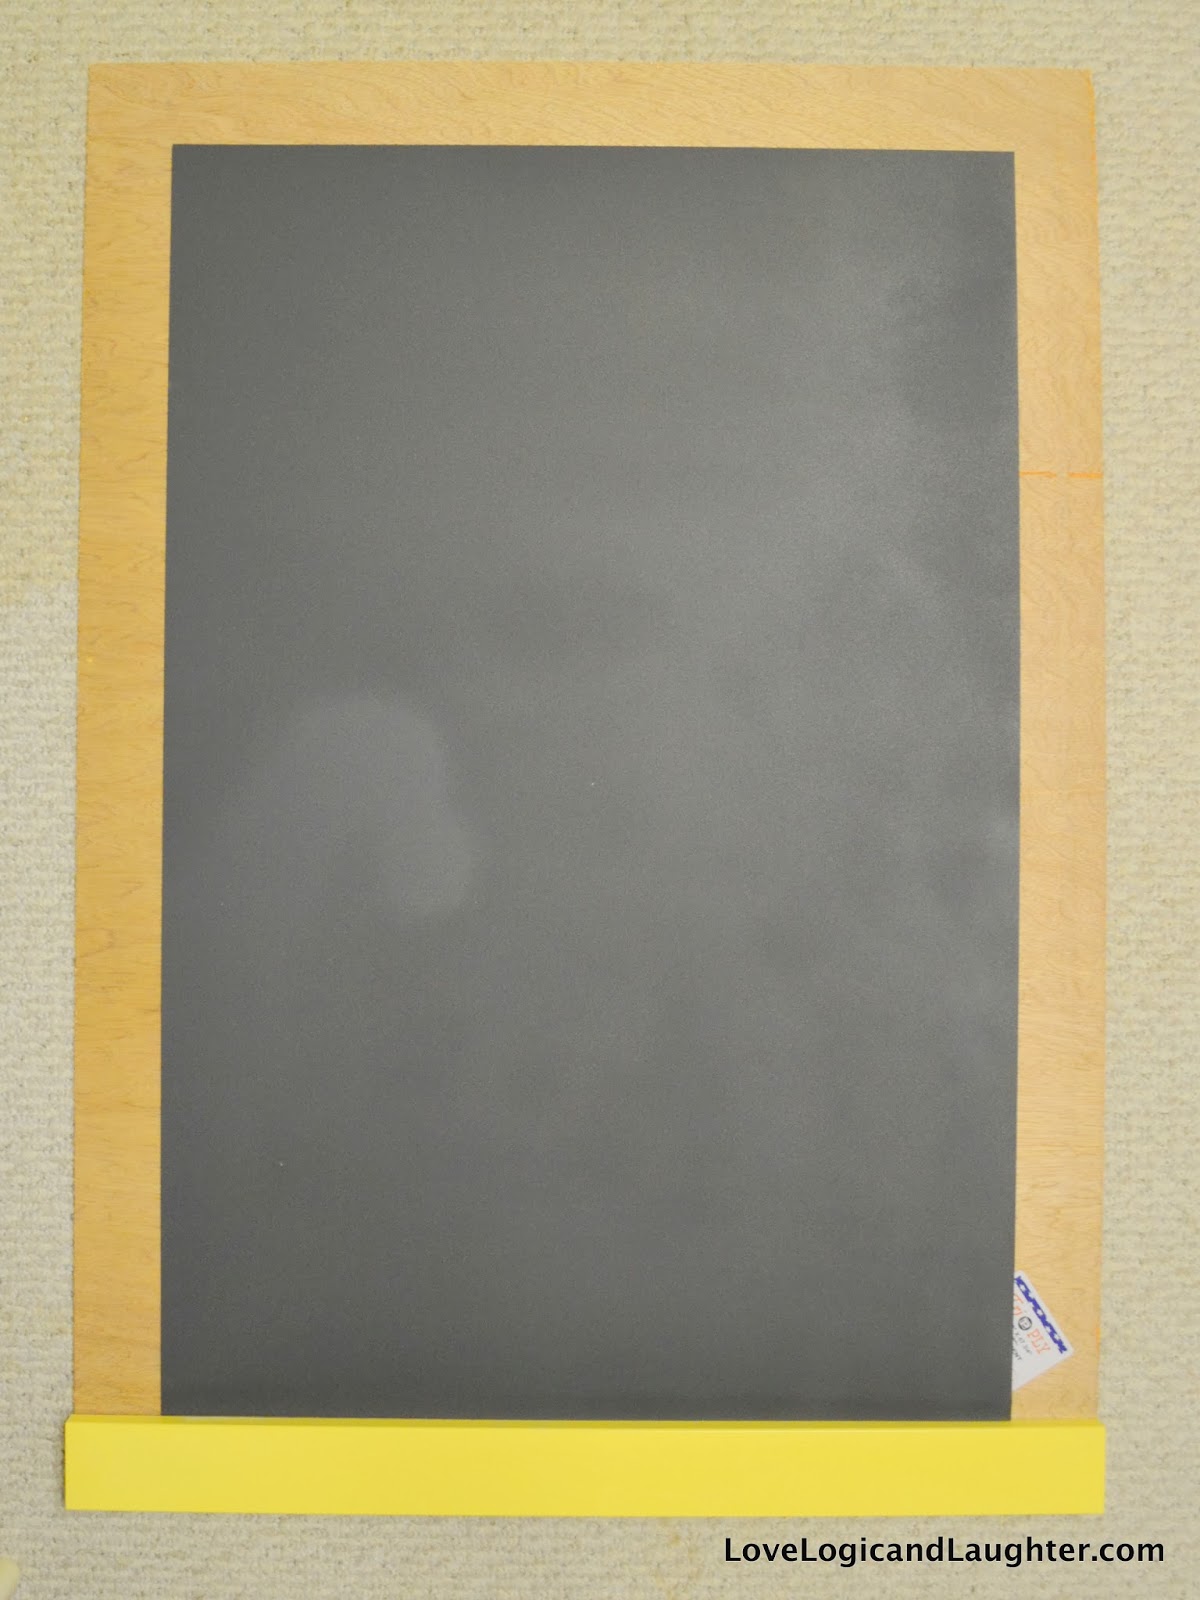 In this photo the sheet metal has been spray painted with chalkboard paint and has
been glued to the plywood. One piece of trim has been added to the bottom.
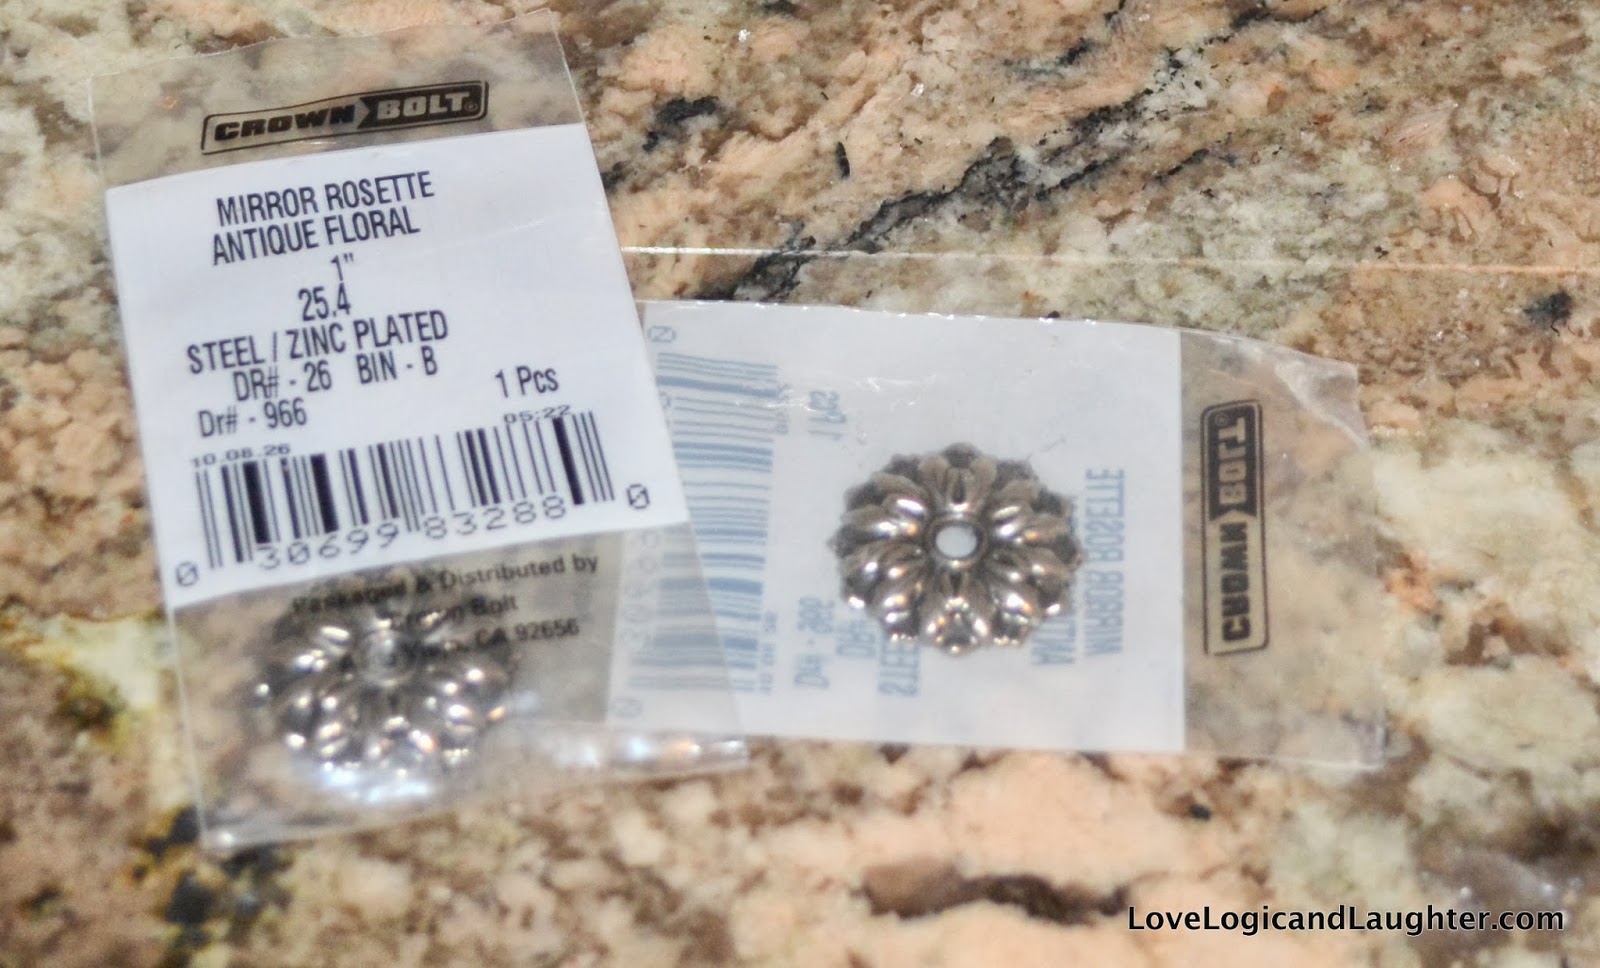
To hang these to the wall I used decorative mirror rosettes to disguise the screws. The screws were visible because they went through the mirror rosette then through the sheet metal and plywood and finally into the wall (into a stud or anchor). I wanted these to fit flush against the wall with no wiggle room at all. The idea was that they almost become part of the wall so that if a child decides to hang from them (which would be hard because you can’t get your fingers behind them to hold on to them) they wouldn’t fall. The mirror rosettes were found at a home improvement store:
All four corners of the boards were screwed into the wall – they aren’t going anywhere! See the silver mirror rosettes each corner of the vertical board below:

We accessorized our boards and also made them into easels using kitchen accessories from Ikea so that we could maximize the space and keep our magnets and art supplies organized.
Have you tried making a chalkboard with chalkboard spray paint? It is one of my favorite products – I have used it so many times!
Is anyone else trying to transform a white box room into an inspiring playroom? We have lots of plans for this room including a reading nook and an indoor swing!


What did you use to mount the craft paper to the wall?
I am a DIY newbie; please forgive all the questions.
How high did you hang the rails (from the floor) for the supplies?
How high were the bottom of the boards (from the floor)? Our daughter is 20 months-old and stands at 29” high.
What brand chalkboard paint did you use?
What construction adhesive did you use?
Thank you for such a great tutorial!