I have had quite a bit of interest on this post:
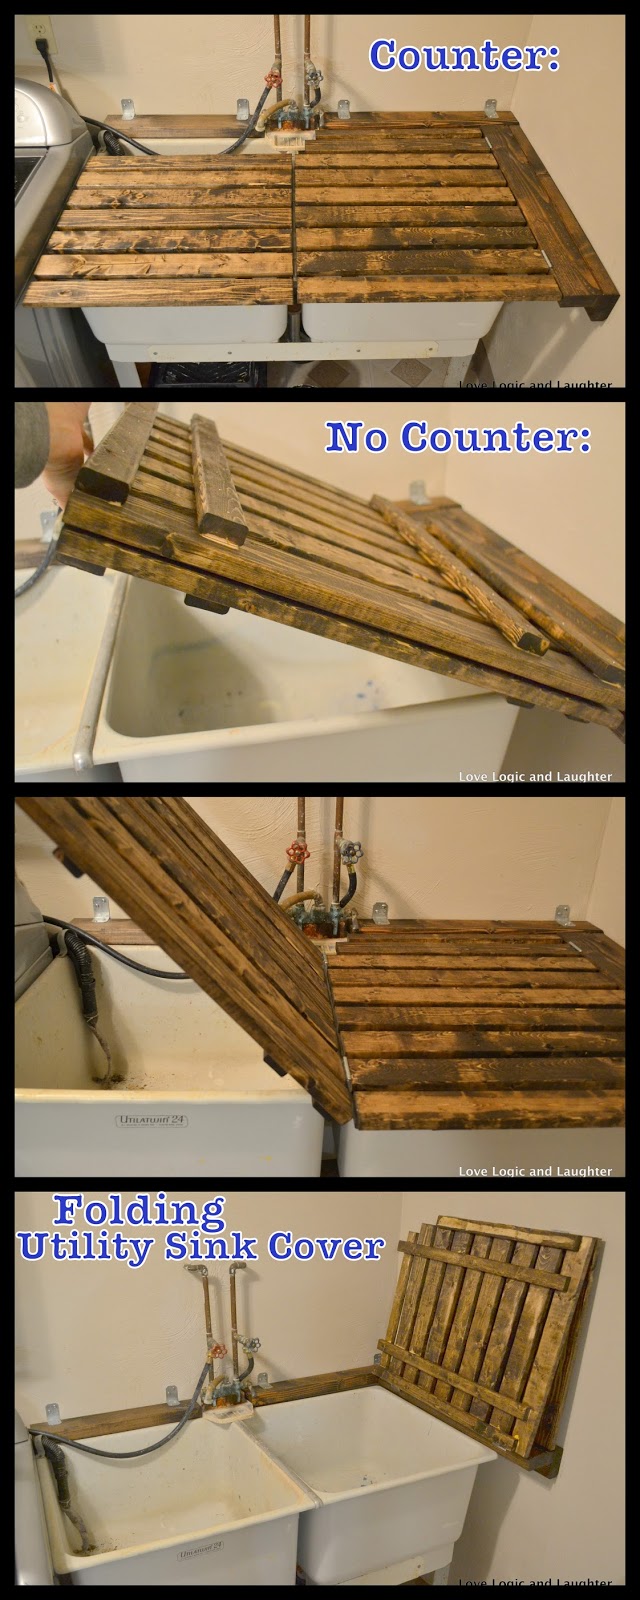 Laundry Room Makeover – Updated Utility Sink – Creating More Countertop SpaceI took a few pictures during the process, so I figured I would share them for others that are attempting to make a hinged lid or cover or workspace for their own utility sinks.

***Materials:
- 1 – 1×2 @ 8 feet
- 4 – 1×3 @ 8 feet
- 4 hinges
- 6 L-shaped brackets (I found mine for 59 cents/piece – not sure what they are called, but I love them!)
- 3 – 2×4 @8 feet
- Wood Glue
- Nails
- Wood Stain
- Wood Sealer
*** These are the materials I needed for my sink just so that you have an idea of what I used. Measure your own sink and space and make adjustments in materials accordingly.
Build a brace for wall: (somewhere for the lid to attach and hinge open/closed. You could also put this behind the sink – I chose to put it to the side of the sink)
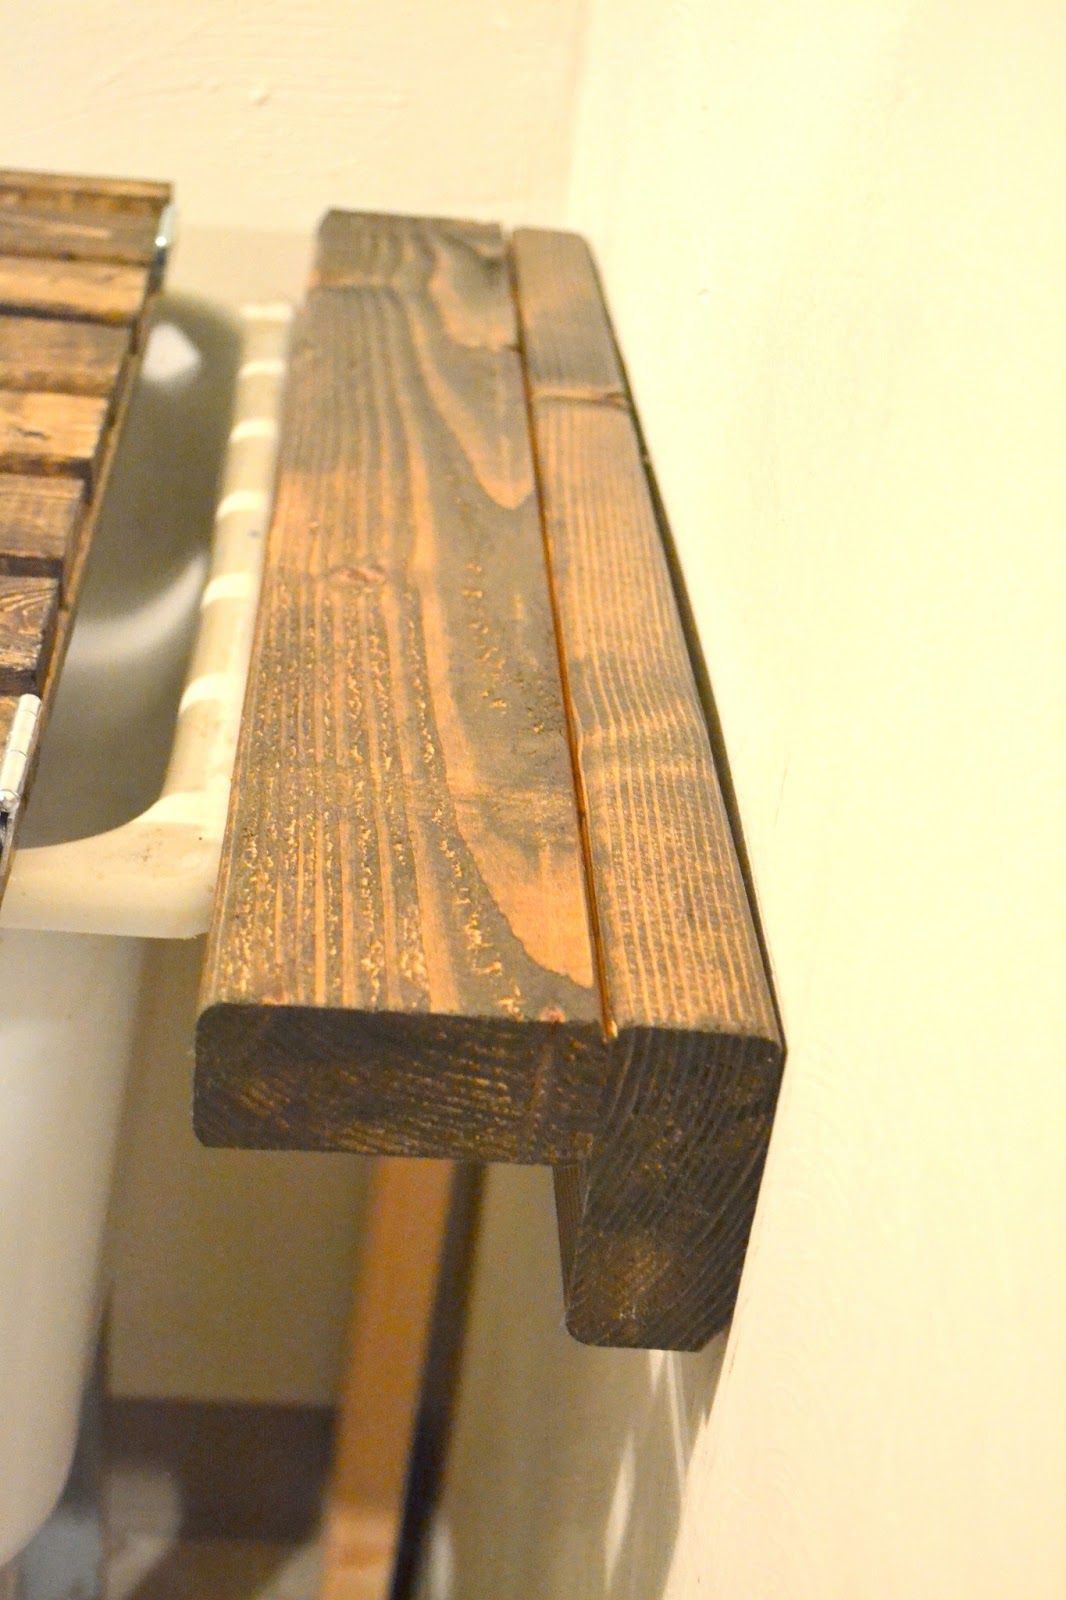
Attach the brace to the wall:

The brace is two 2×4’s – you can see I used L-shaped brackets to attach them together (I also added wood glue between the adjoining surfaces). I then screwed this brace into the wall studs. You can see the brace on the right in this picture – attached to the wall and ready for the right basin lid to be attached.
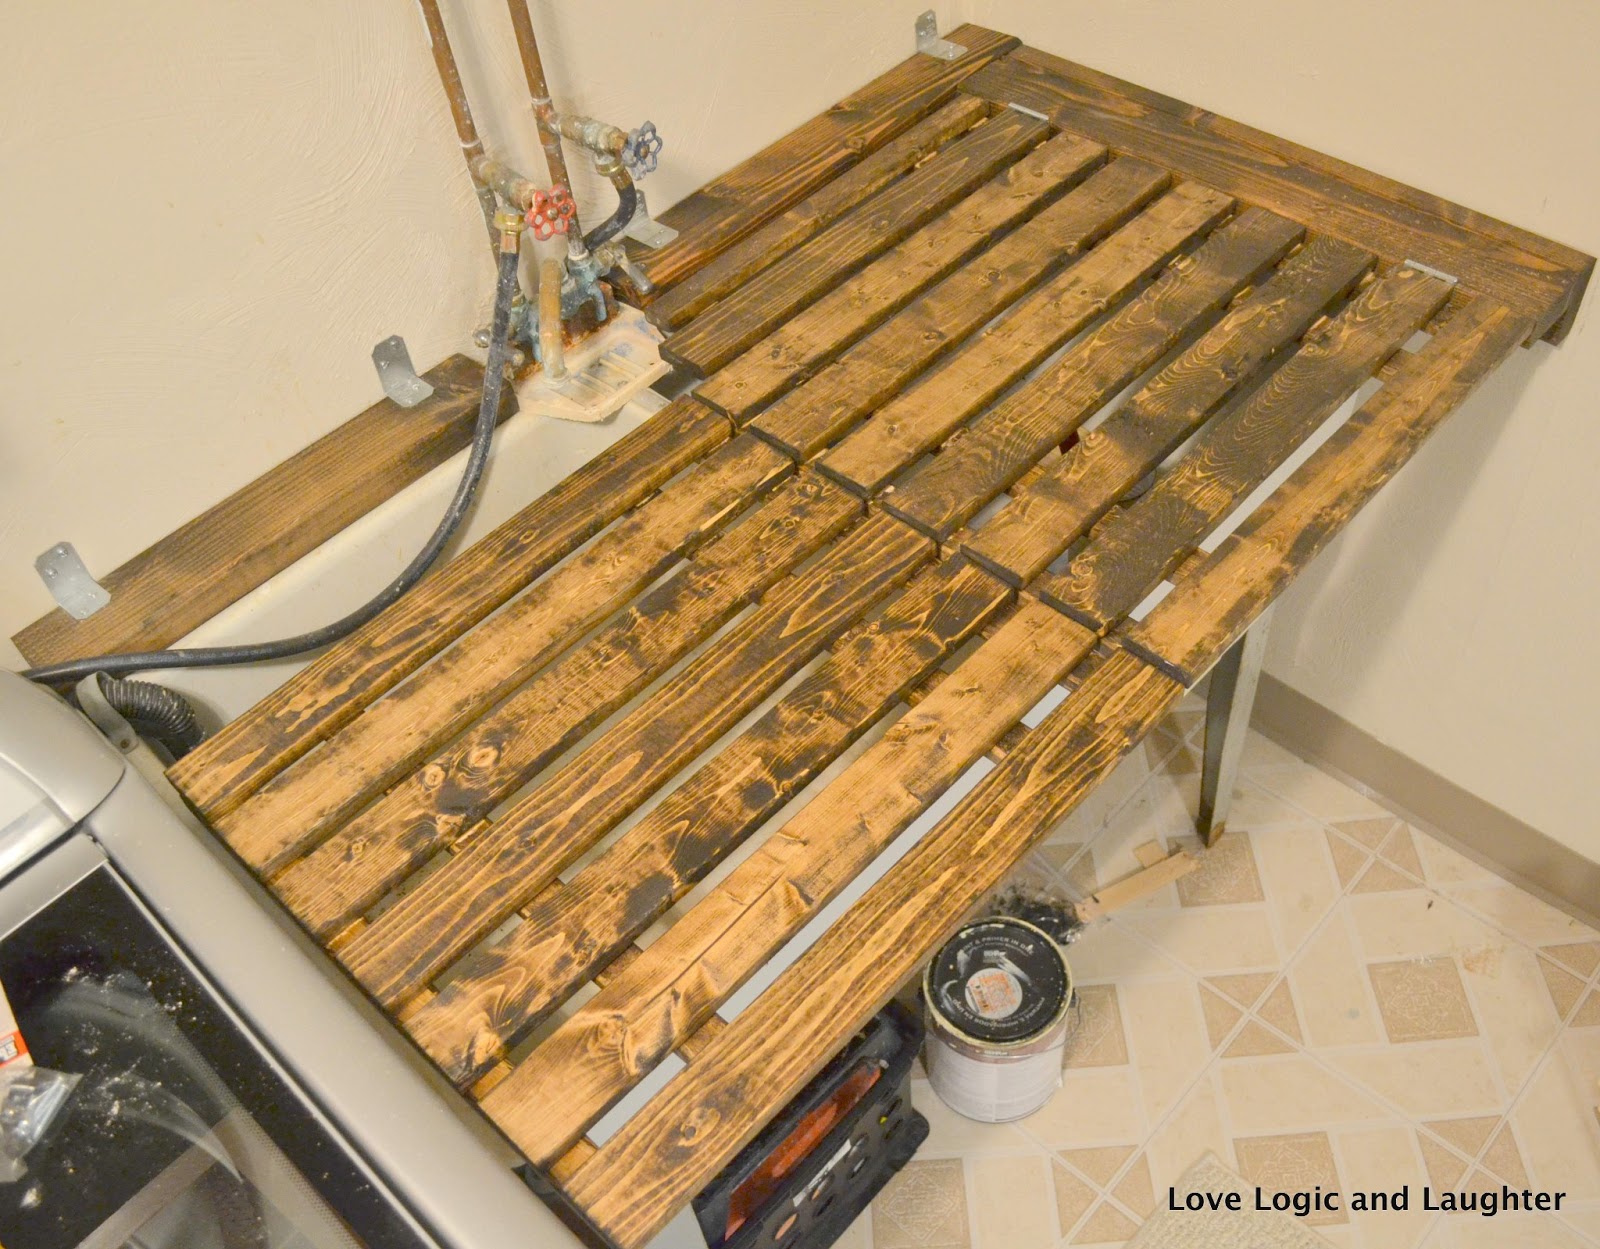
Build the lid out of 1×3’s and 1×2’s:
 The 1×3’s are my horizontal boards and they are supported by 4 1×2’s.
 I used scrap 1×2’s pieces to make sure all my horizontal boards were evenly spaced.
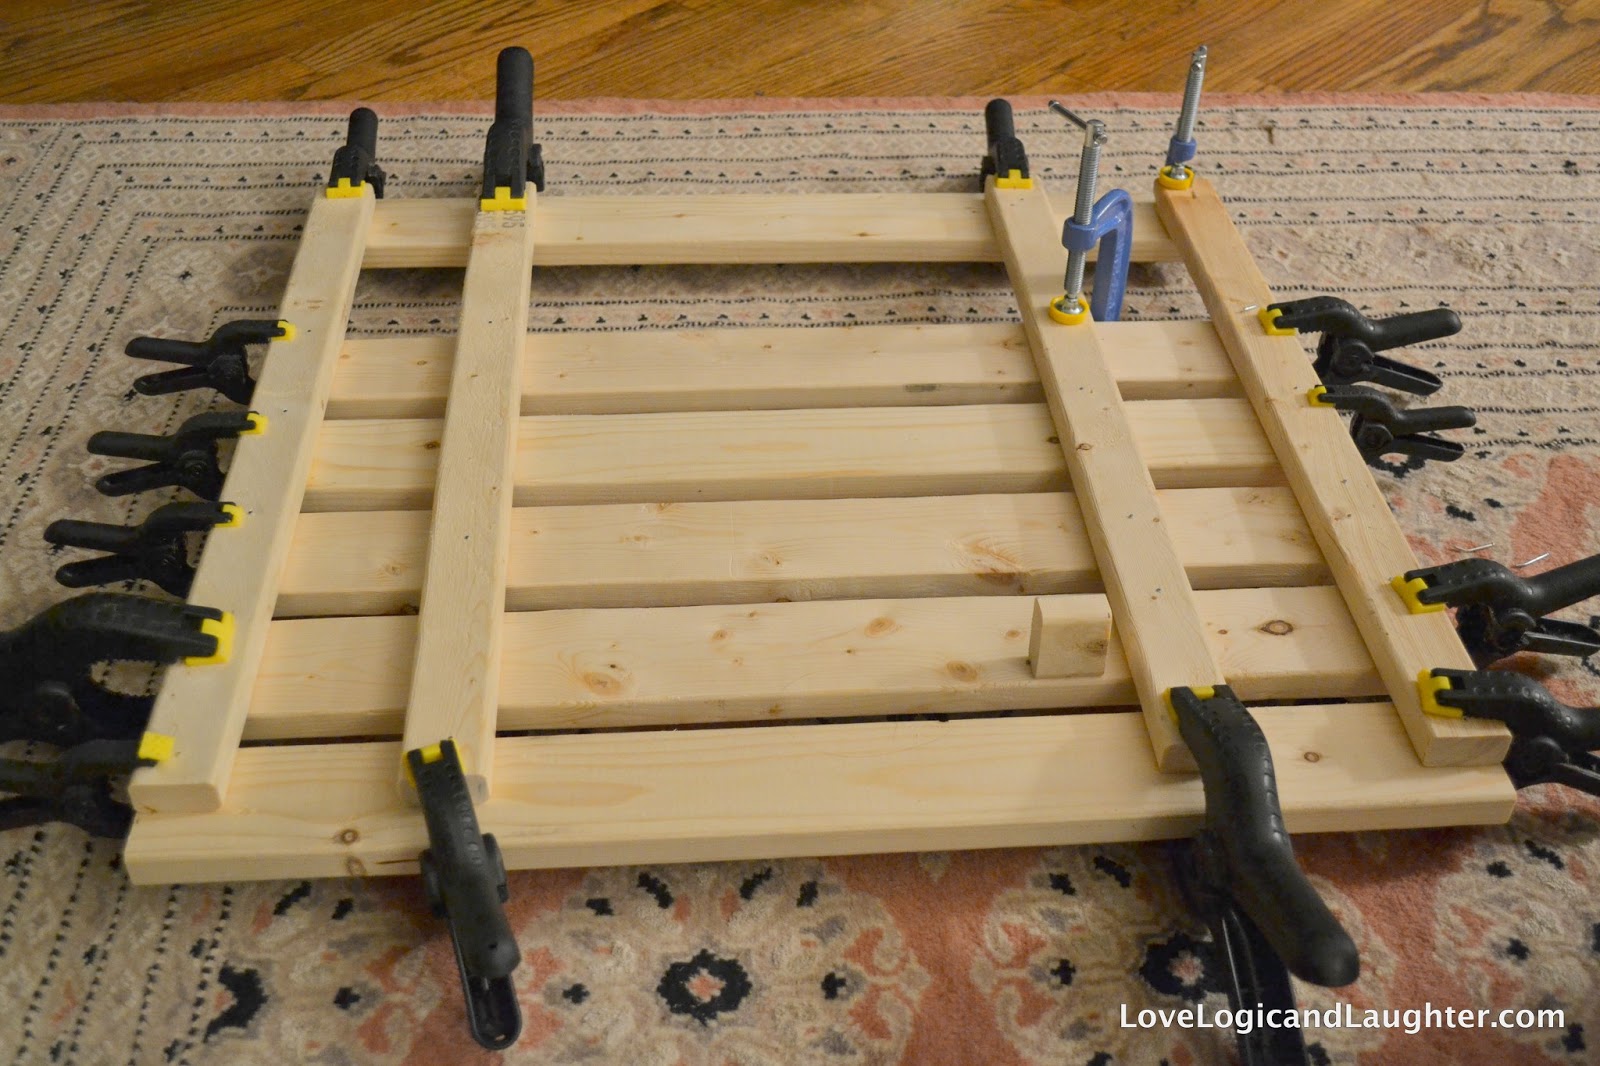 I added wood glue and nailed from the bottom (down through the 1×2 into the 1×3’s) and clamped
Stain the cover and add hinges:
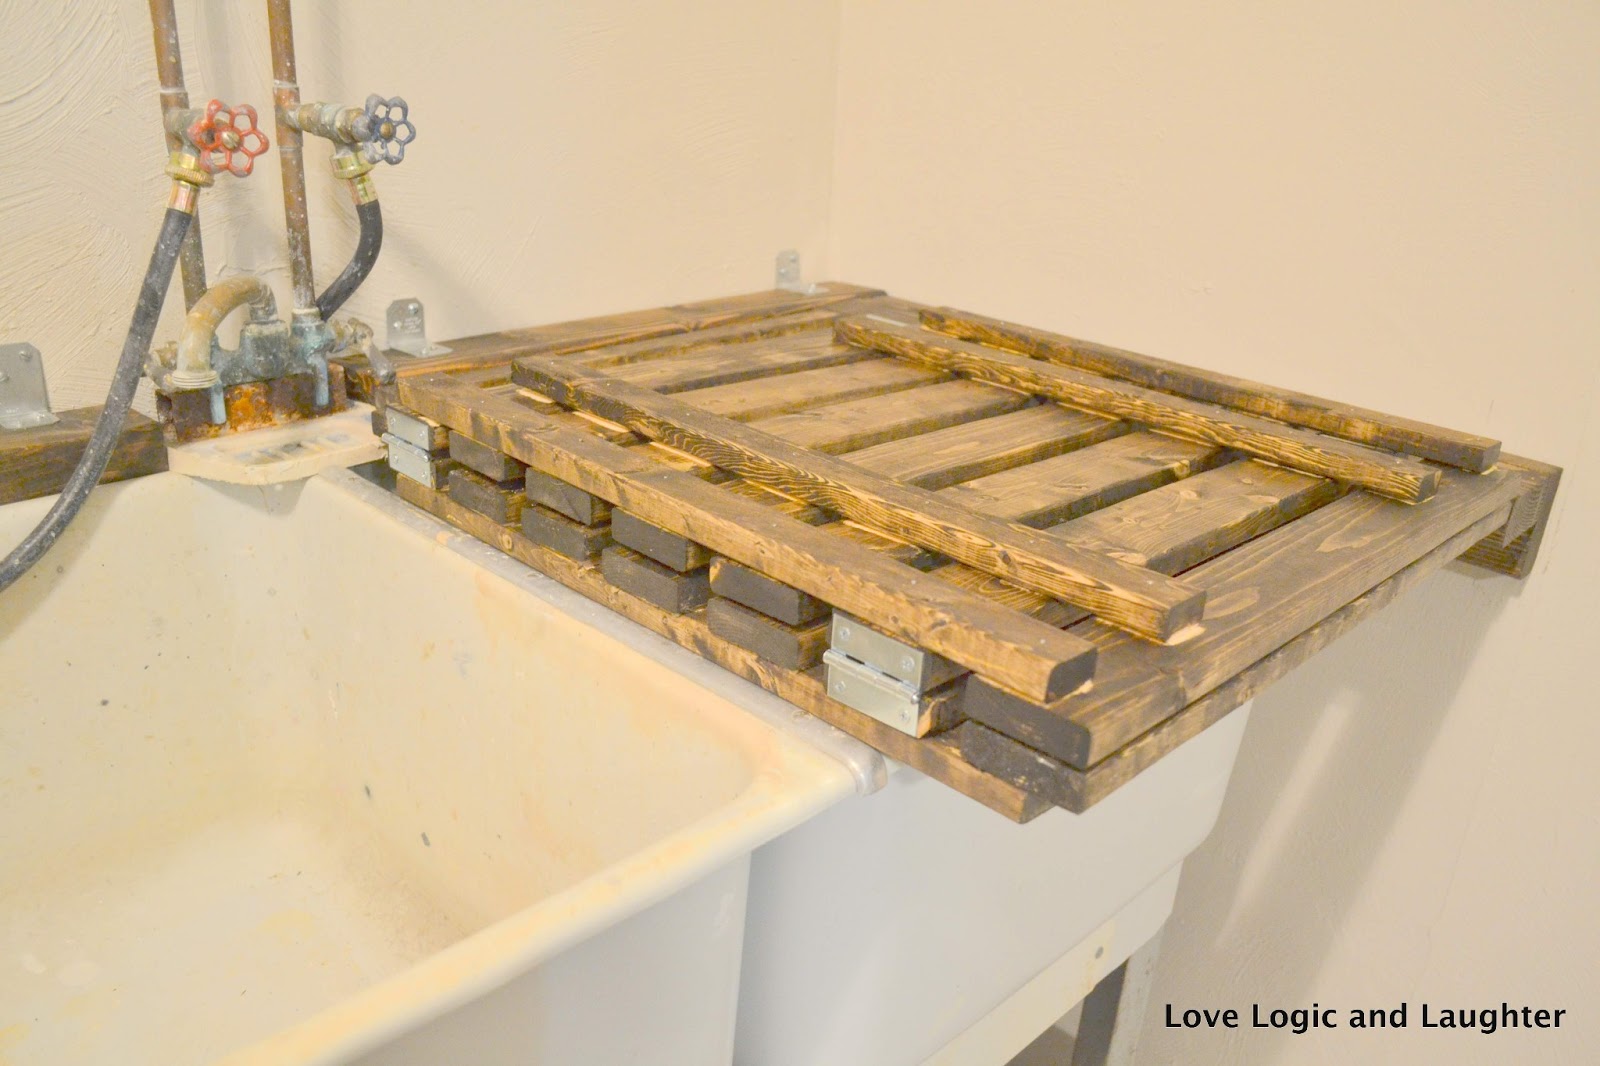
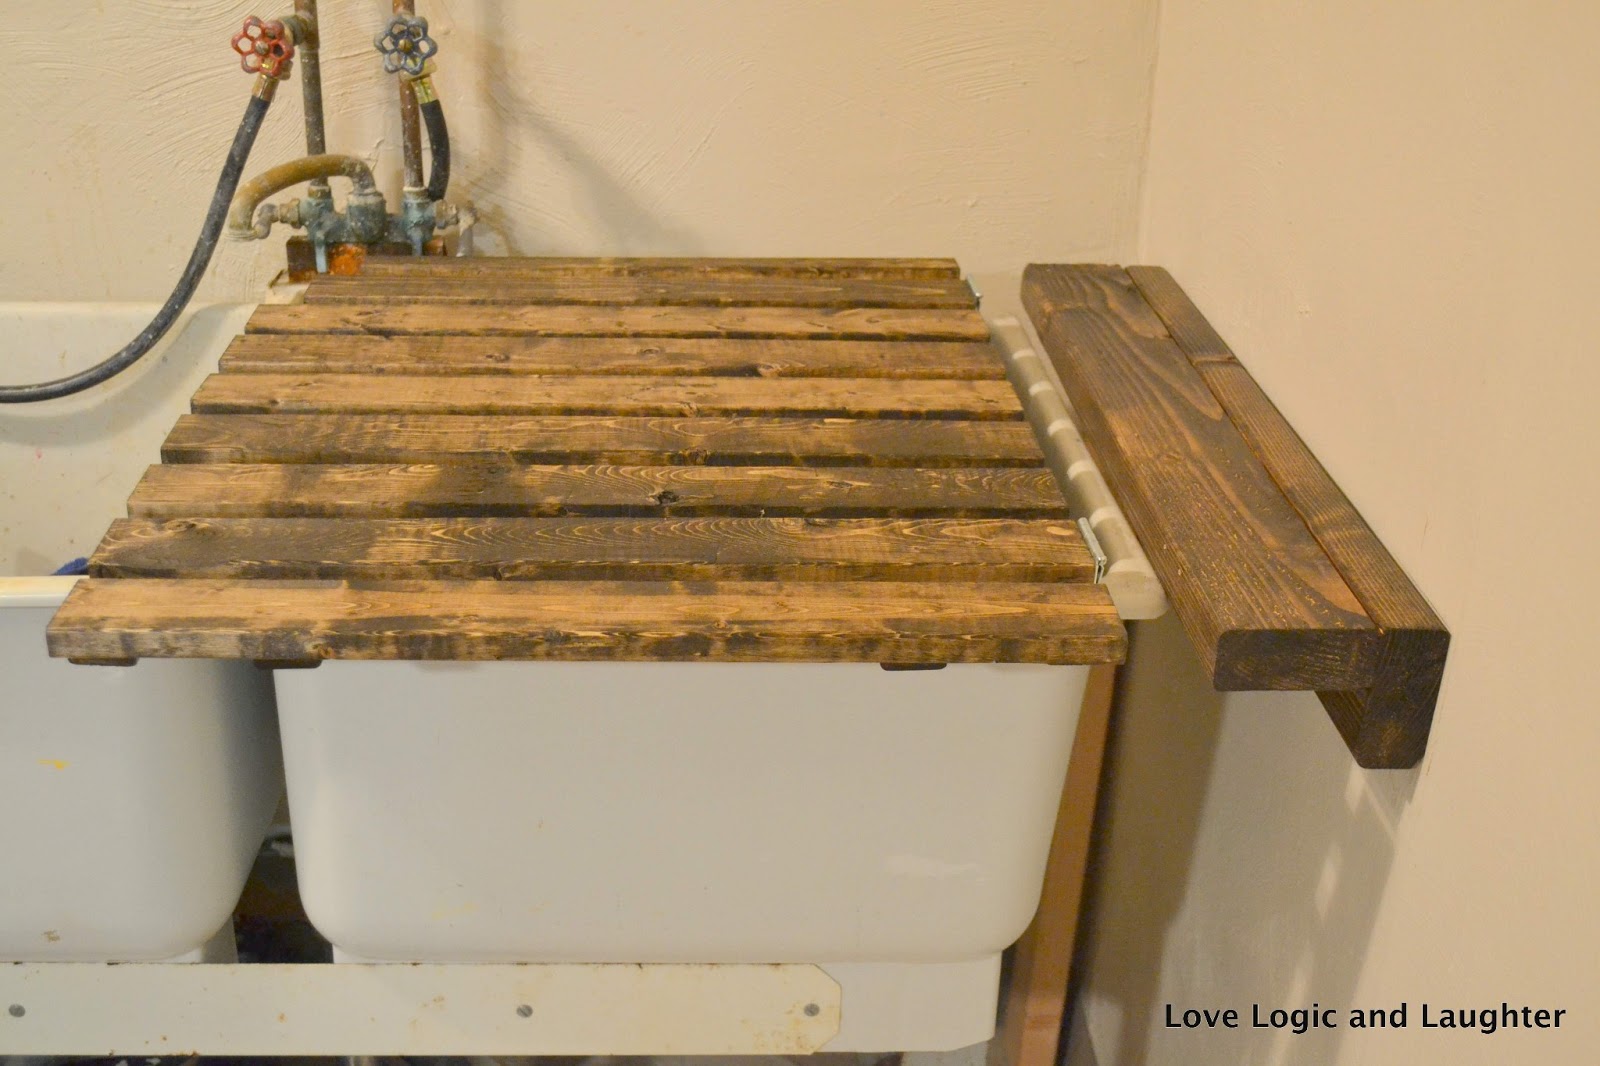 Here it is ready to be attached by hinges to the brace on the wall
  Right basin cover attached
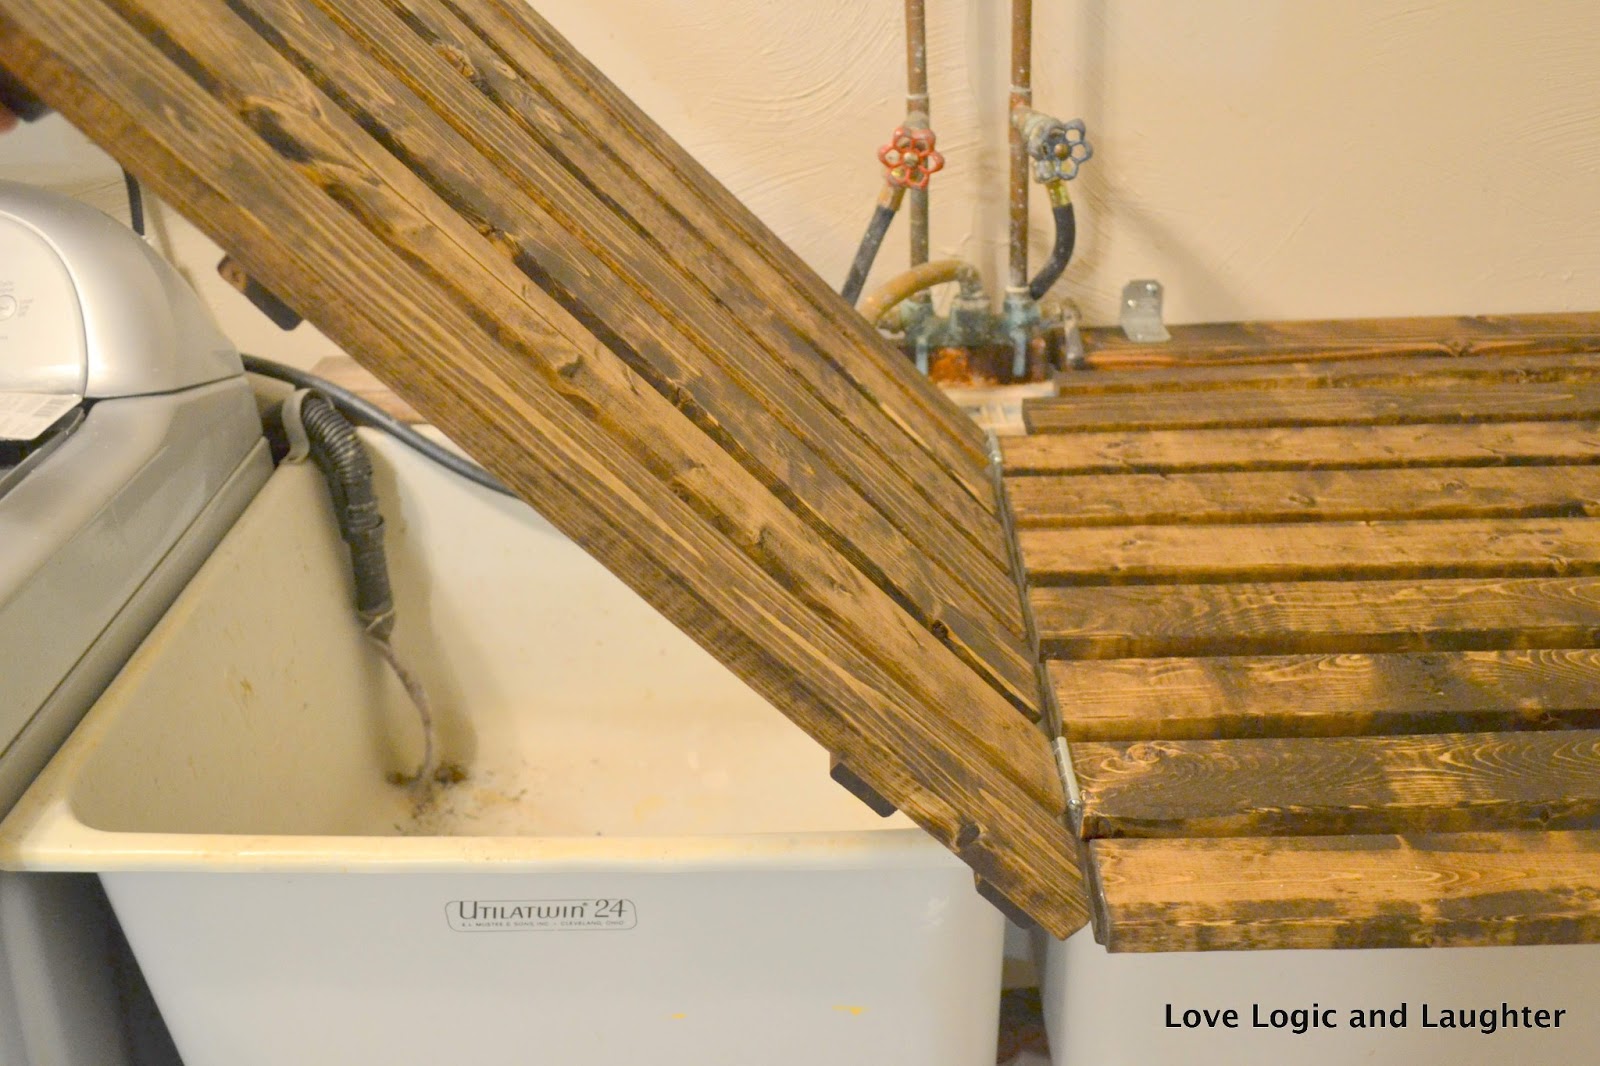
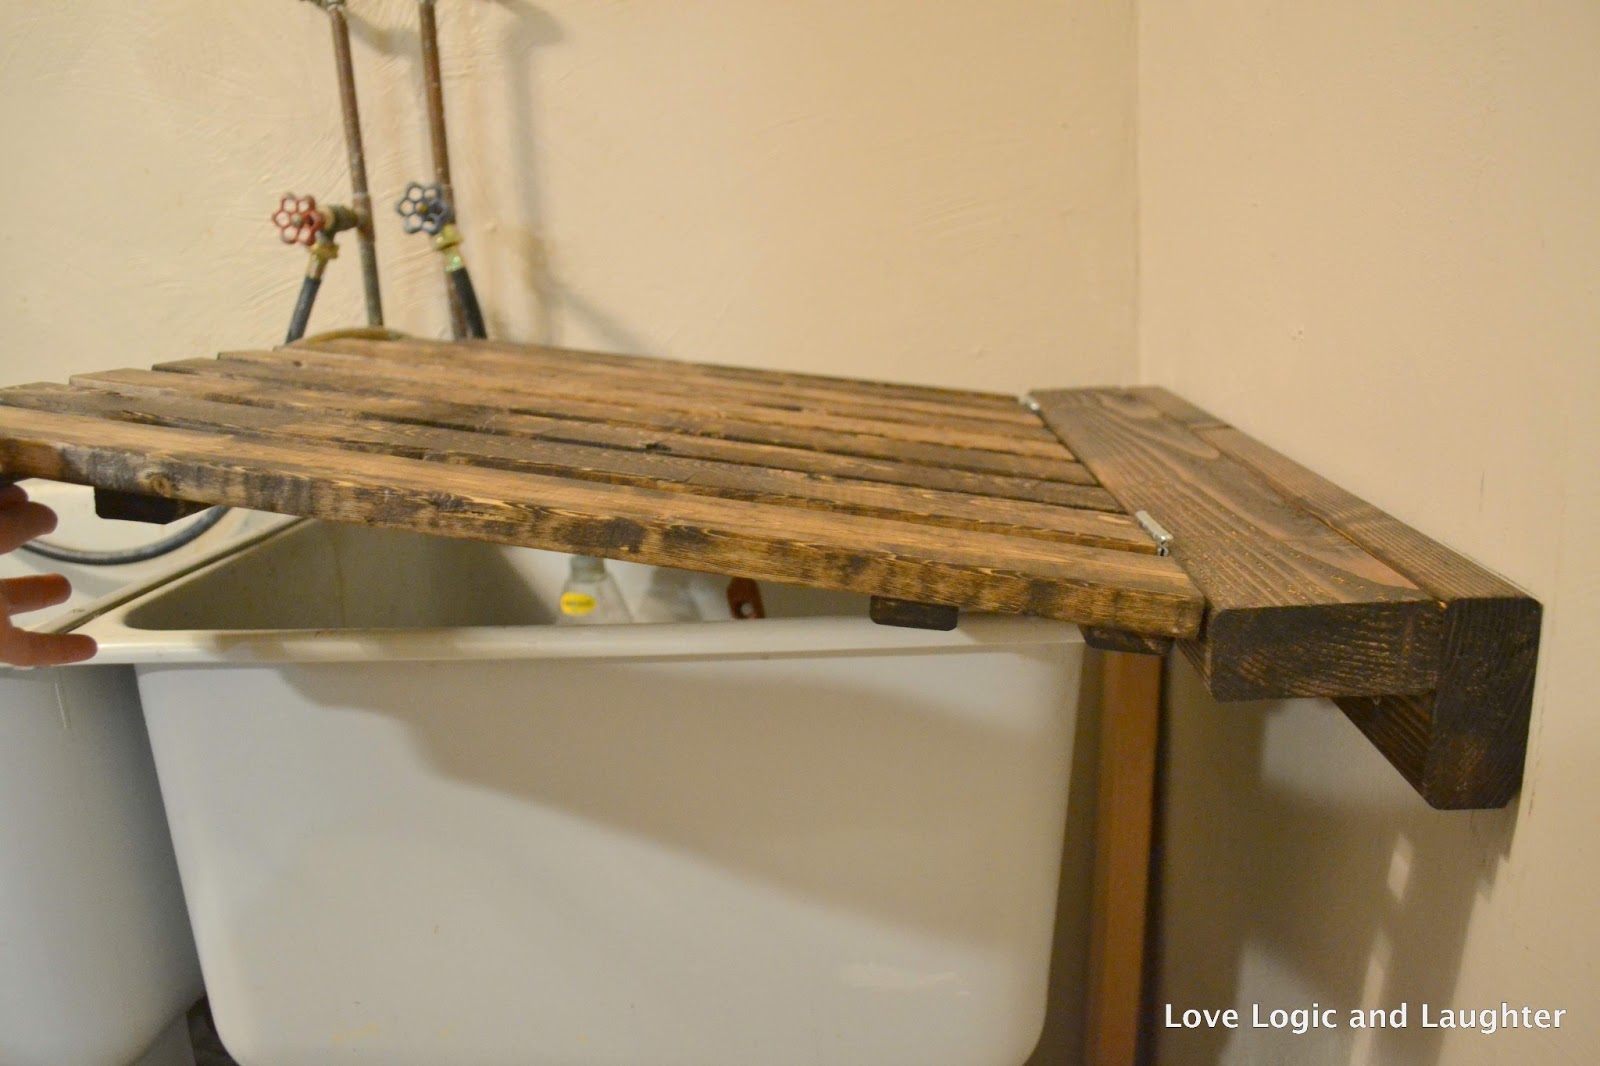 Right basin cover being lifted open
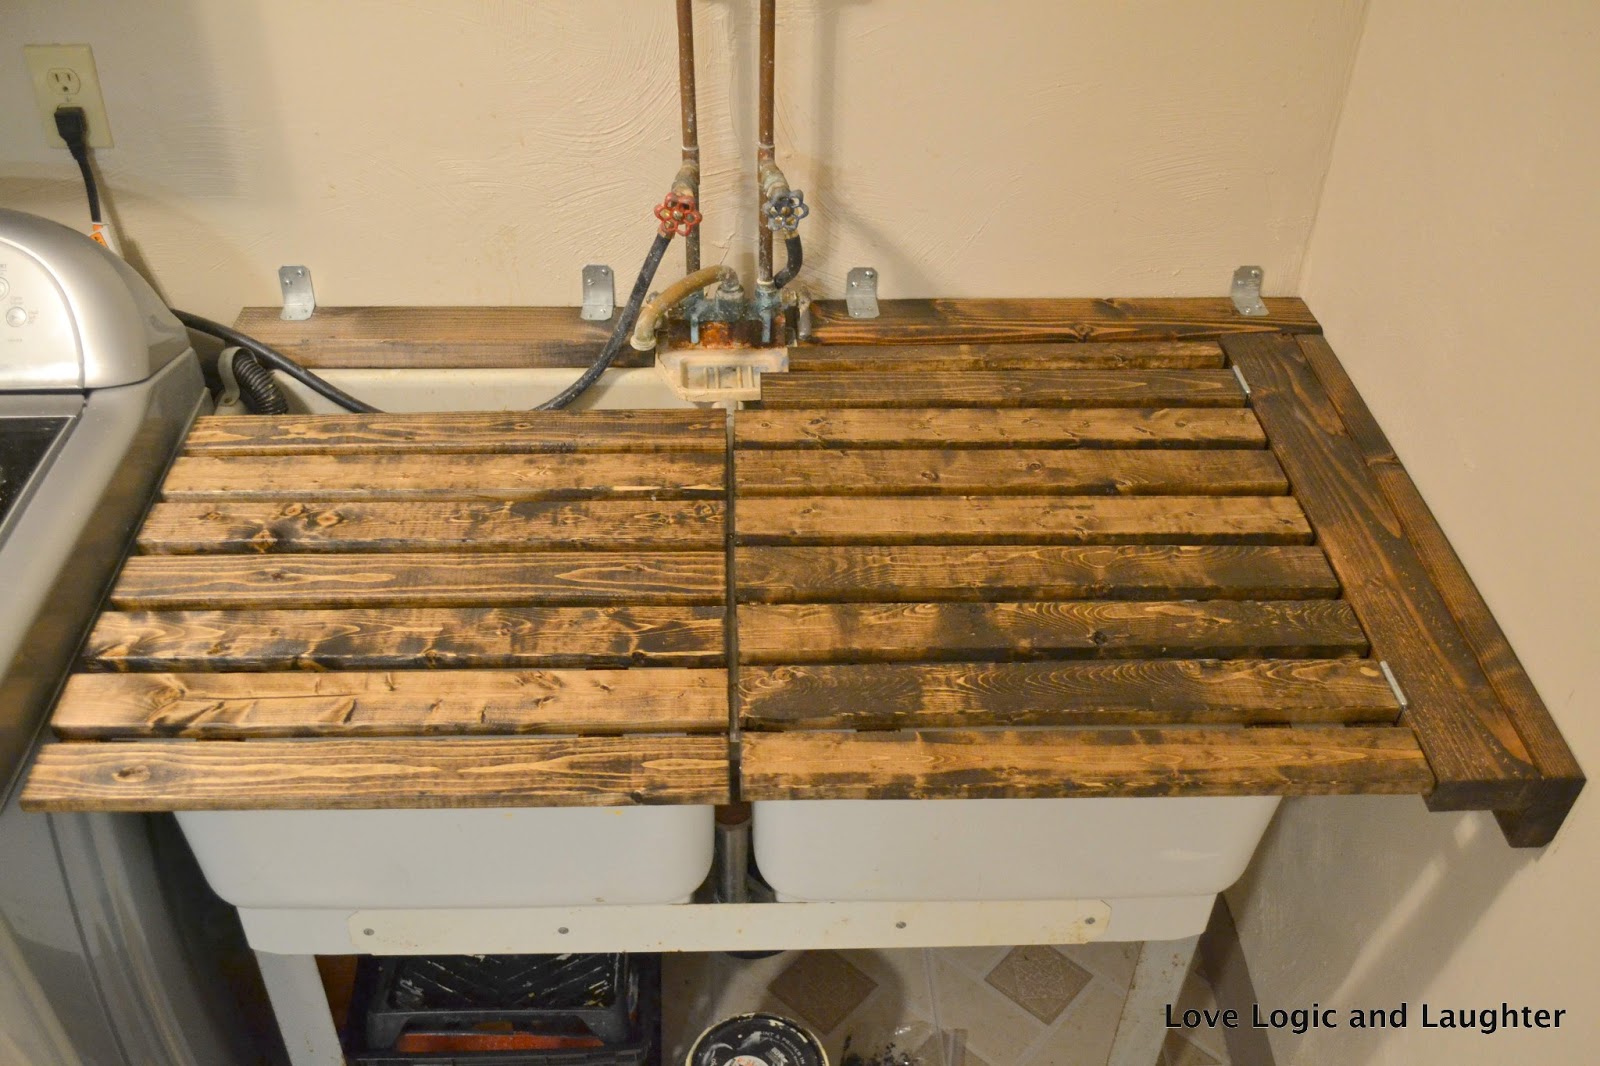
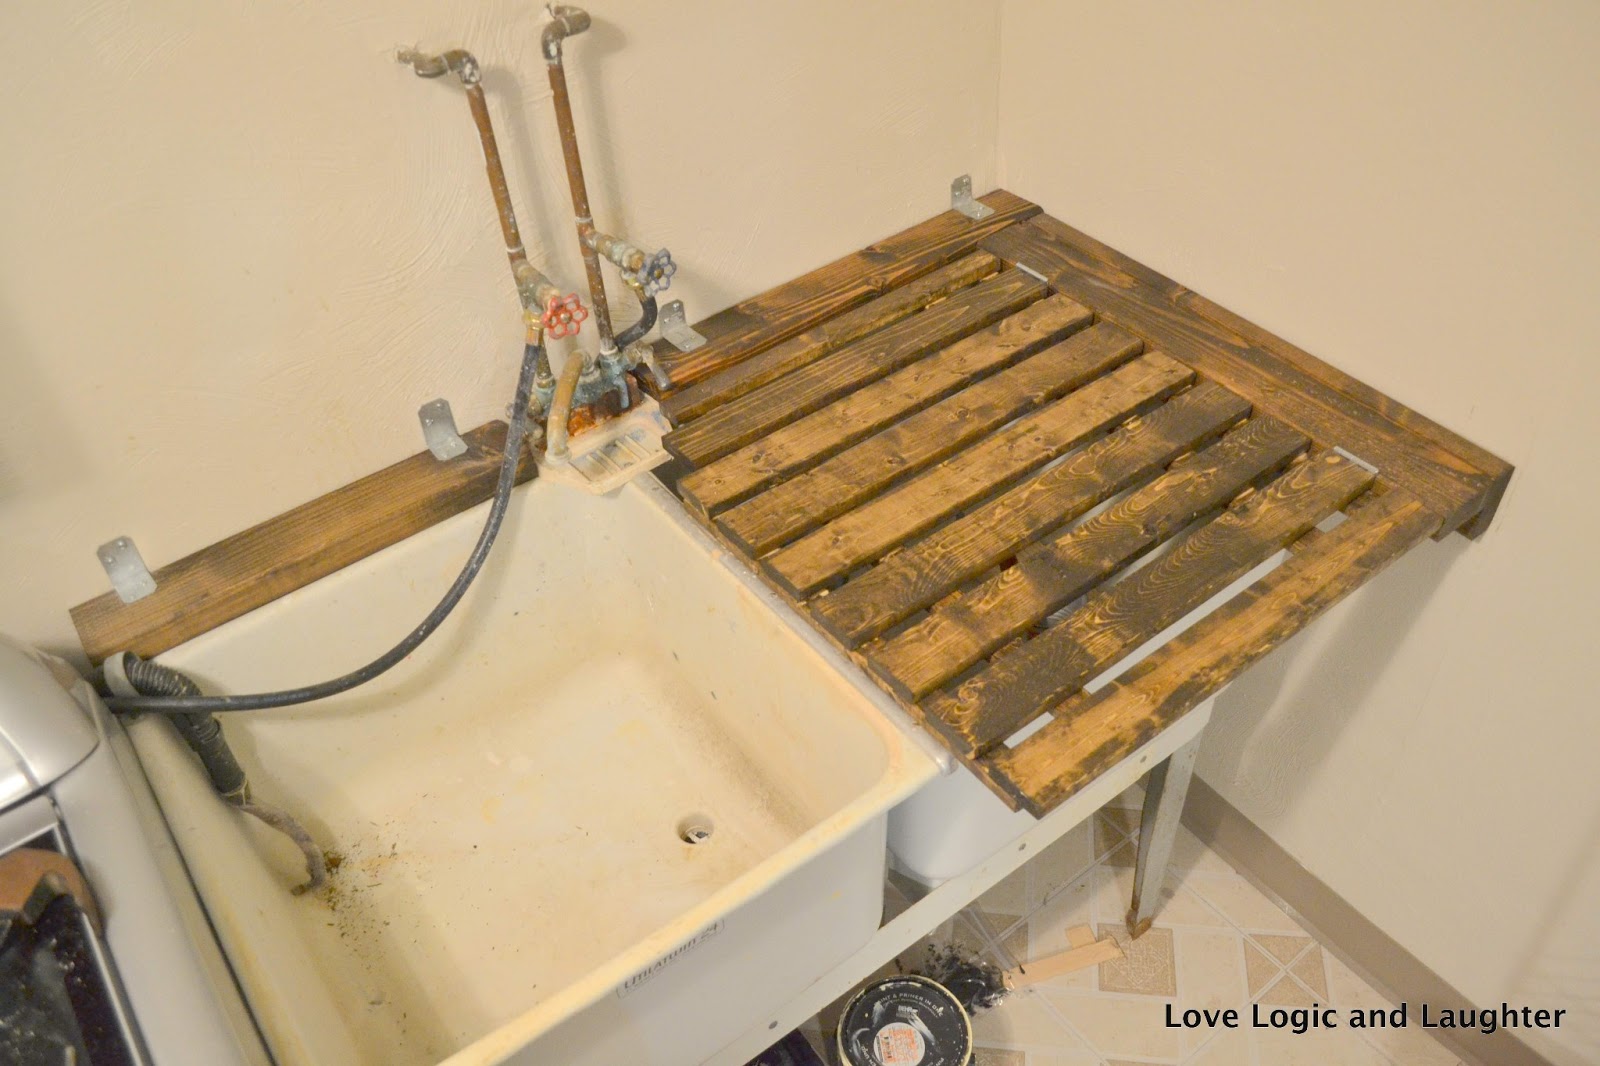 Overhead view of right sink basin attached
Build a second cover for left sink basin:
 Left sink basin built and doing a dry fit
Stain and add hinges to left sink basin cover:

 A close up on the middle hinges (hinges between the two basin lids).
Test out your cover!
 Left basin cover opening
 Right basin cover opening
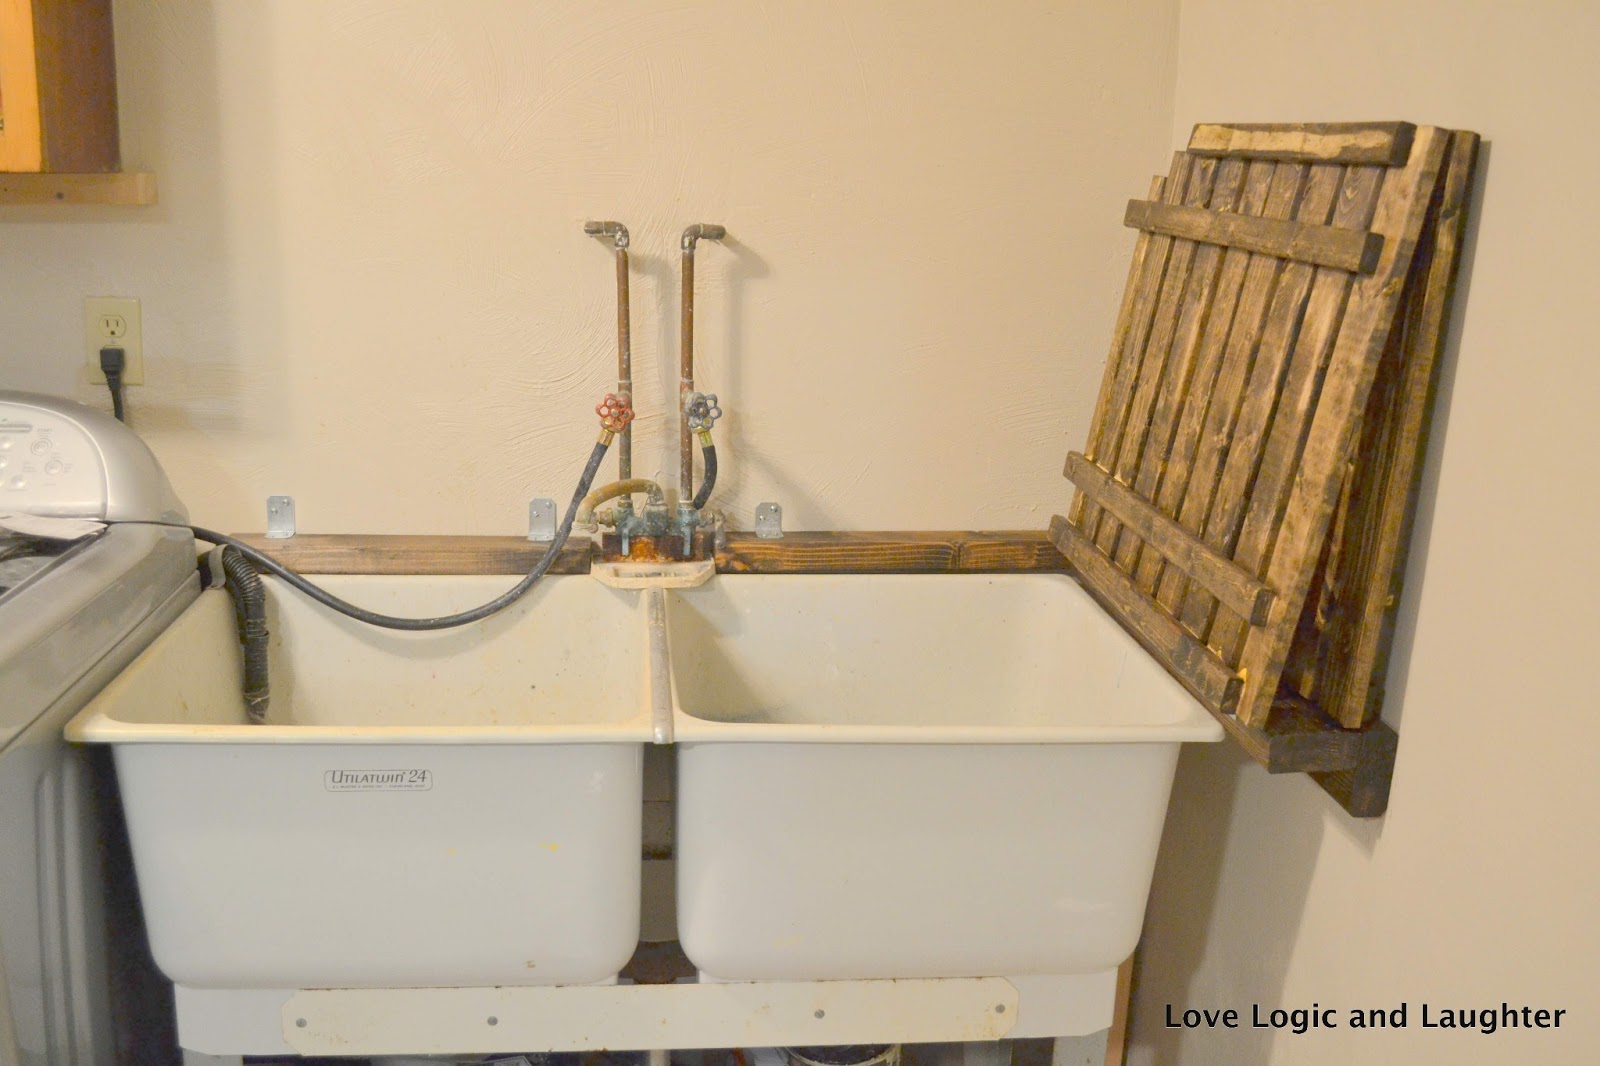 Both basins open and ready to useFor the original post with more pictures on the finished product check this out HERE
Links for details on the individual Laundry Room Makeover DIY Projects:
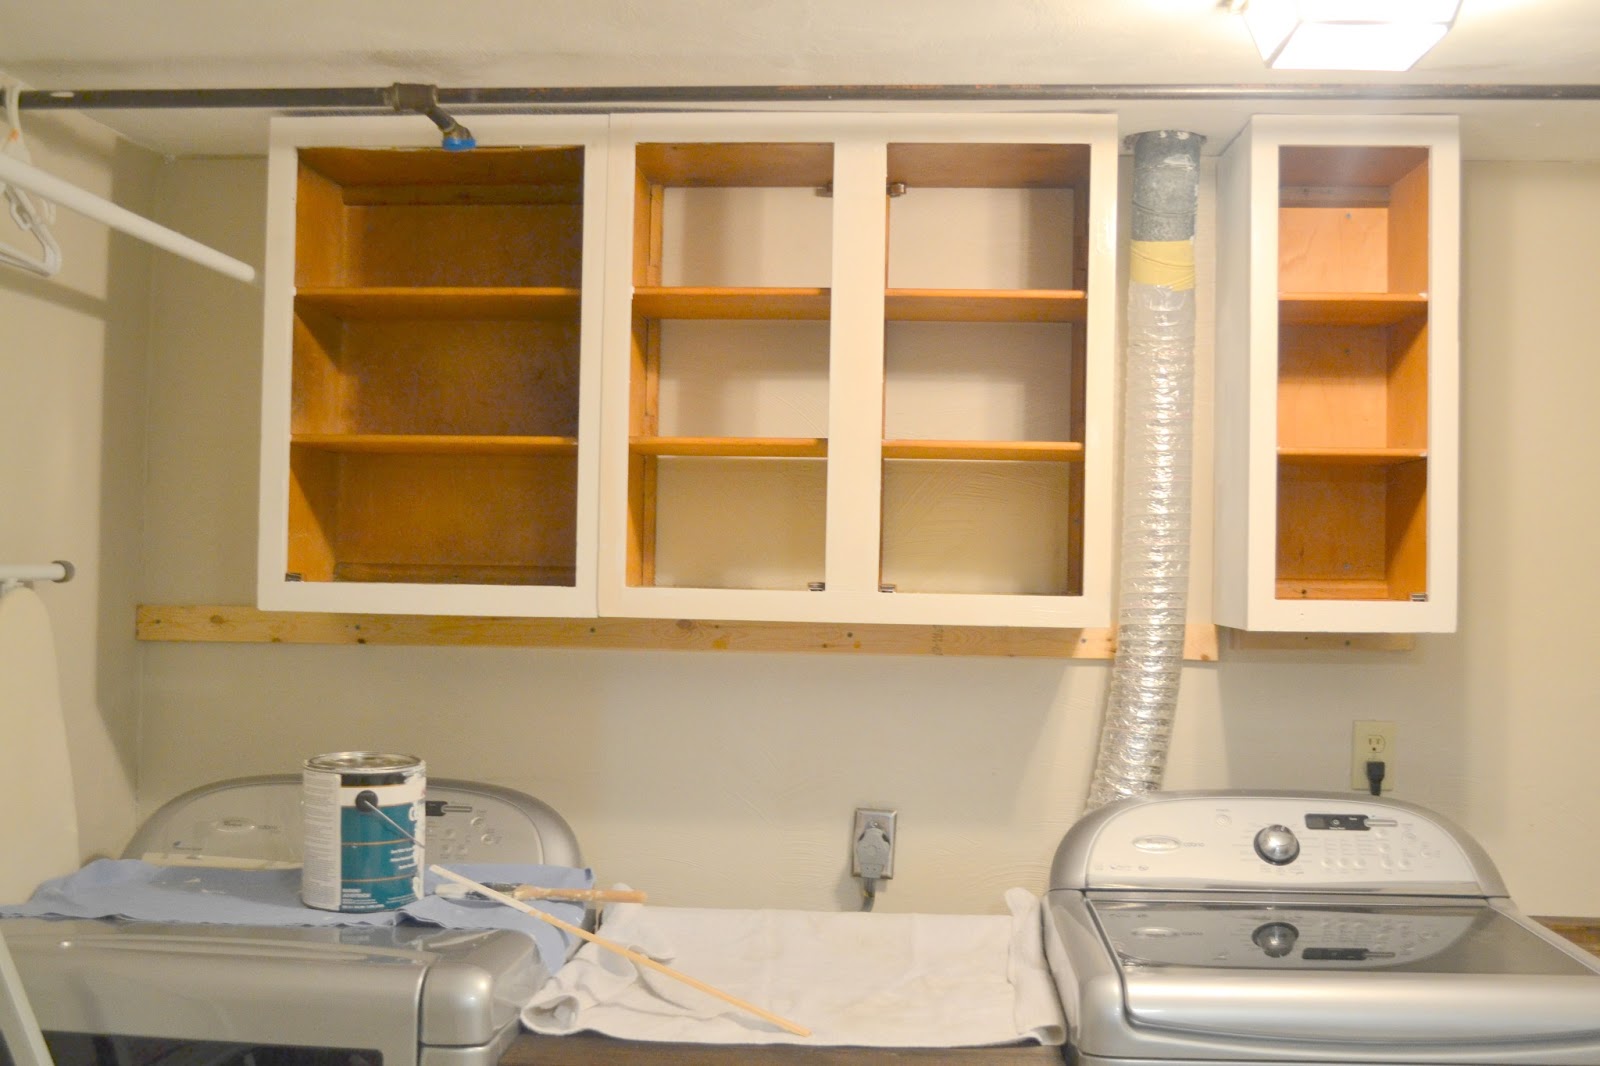
- Installing New/Old Cabinets For Storage
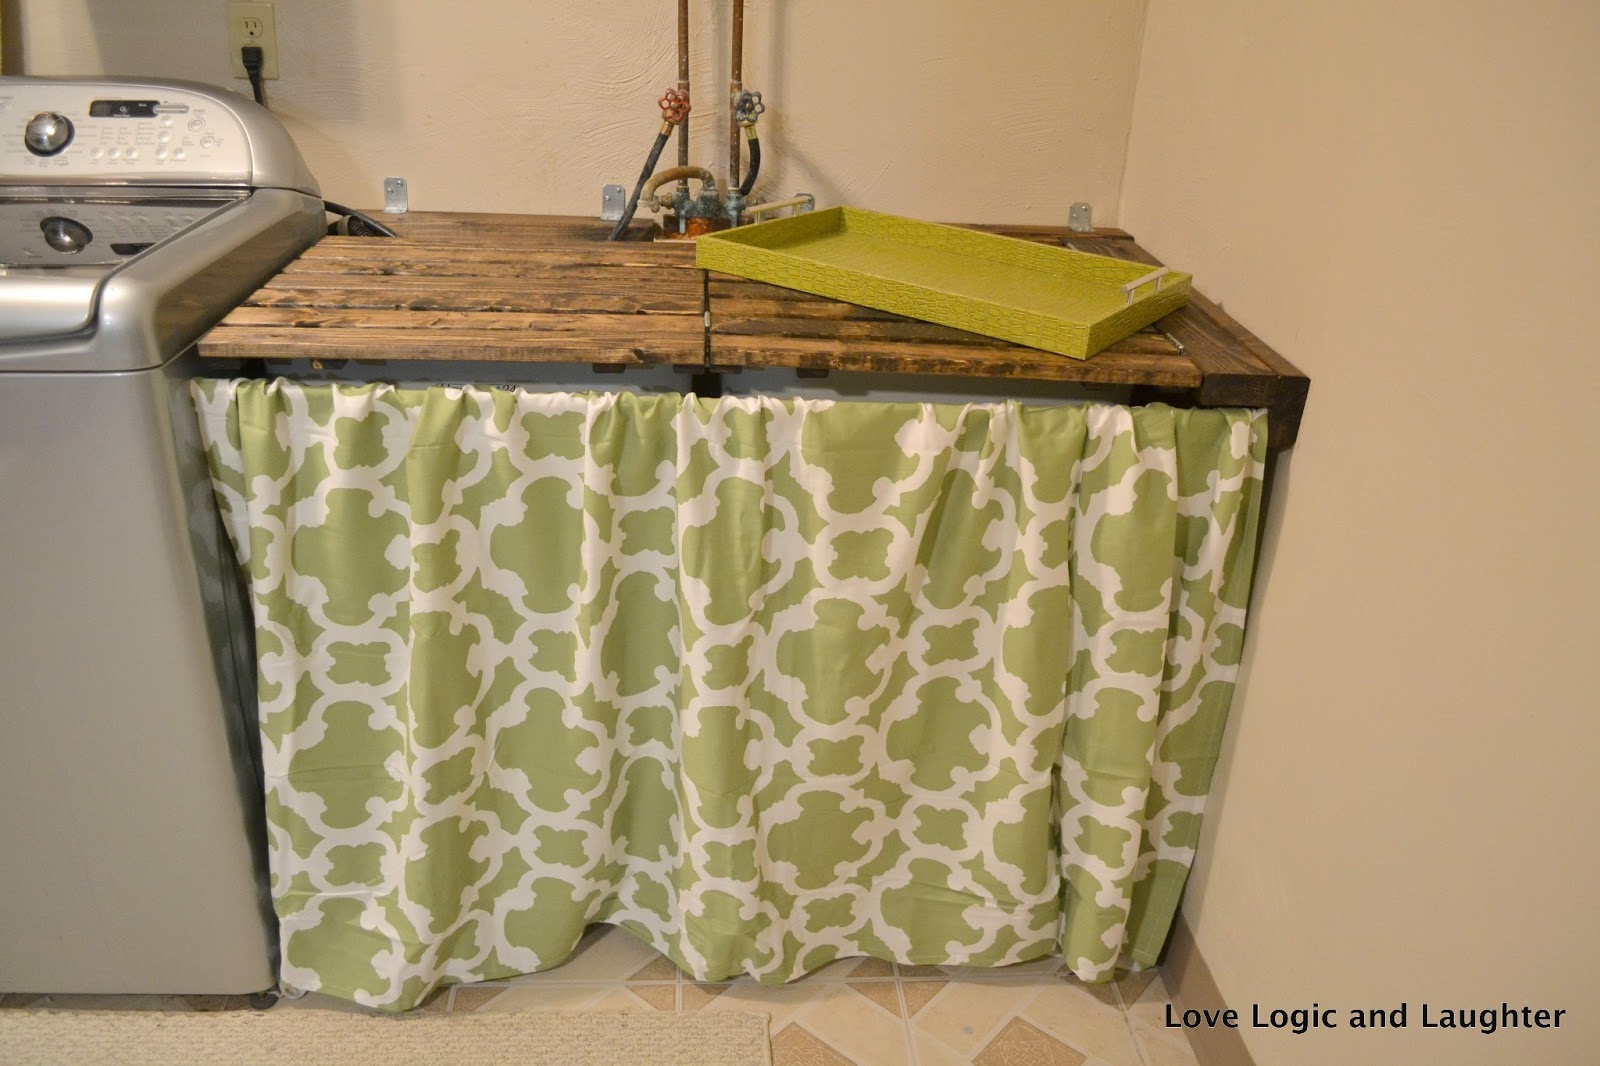
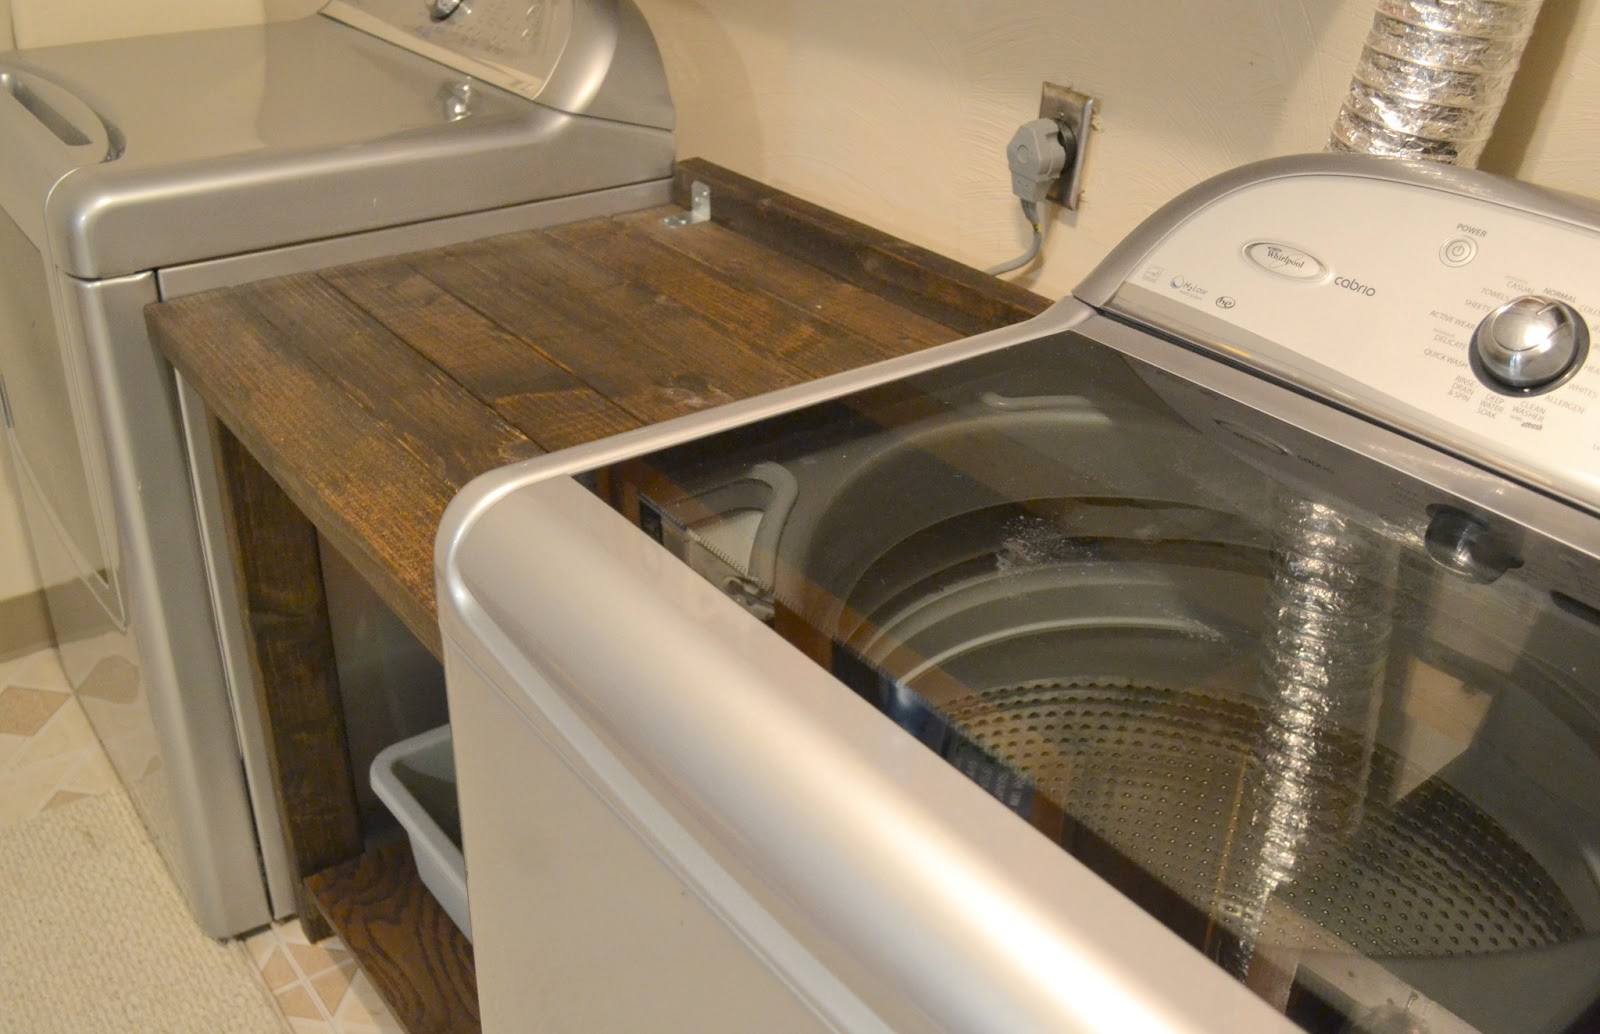
- Even MORE Countertop Space – Building a “cabinet” between the washer and dryer with 2×4’s
- Built in Corner Shelves – a basement “pantry”

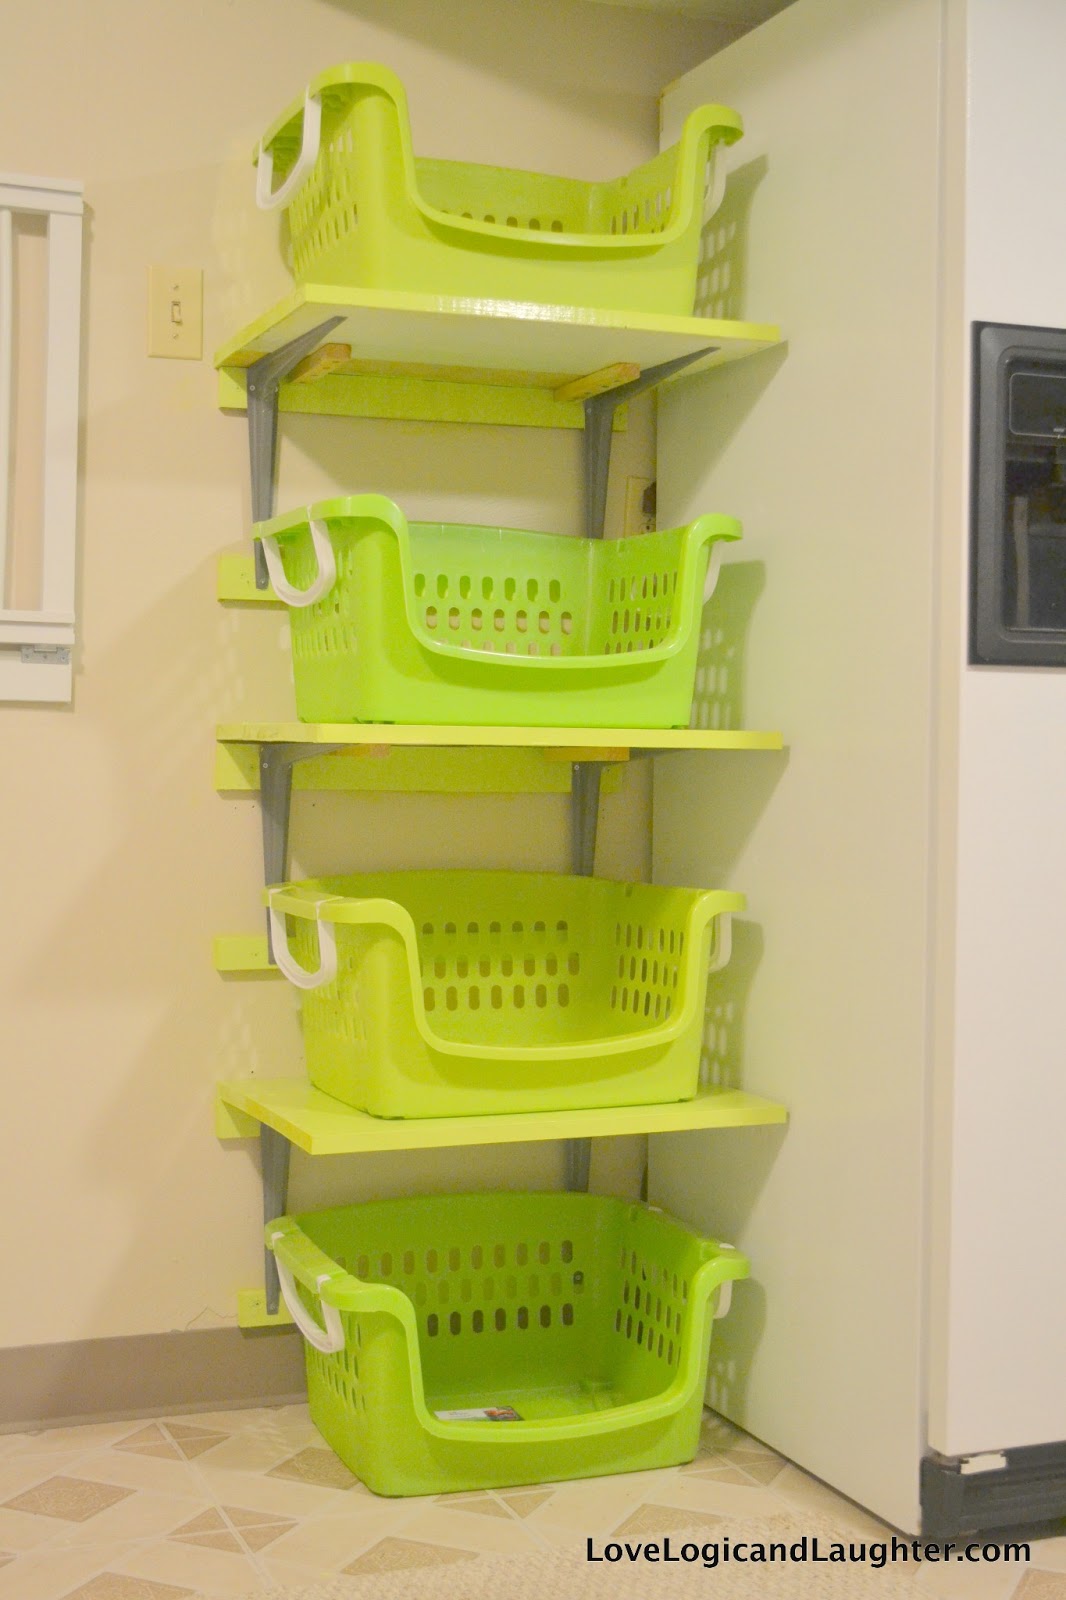
- Built in Shelves for Laundry Baskets
- DIY wall folding drying rack

- DIY Fold-Away ironing board
- Utility Sink Cover Tutorial

- Bringing it all together – artwork and details – The Final Reveal!